

In this post lets see how we can add AWS ec2 servers as dynamic agents for the Jenkins master. As we already know that jenkins is a master-slave configuration which means, we install jenkins in master server and add agents so that we use these agents to run the jobs.
Lets achieve this step by step:-
Prerequisites:-
You have an AWS account: If not please sign-up here
You have an instance of Jenkins running If not please follow steps here. There are different ways to install the Jenkins. I have downloaded jenkins.war file and used below command to run jenkins in Mac.
java -jar jenkins.war --httpPort=9090
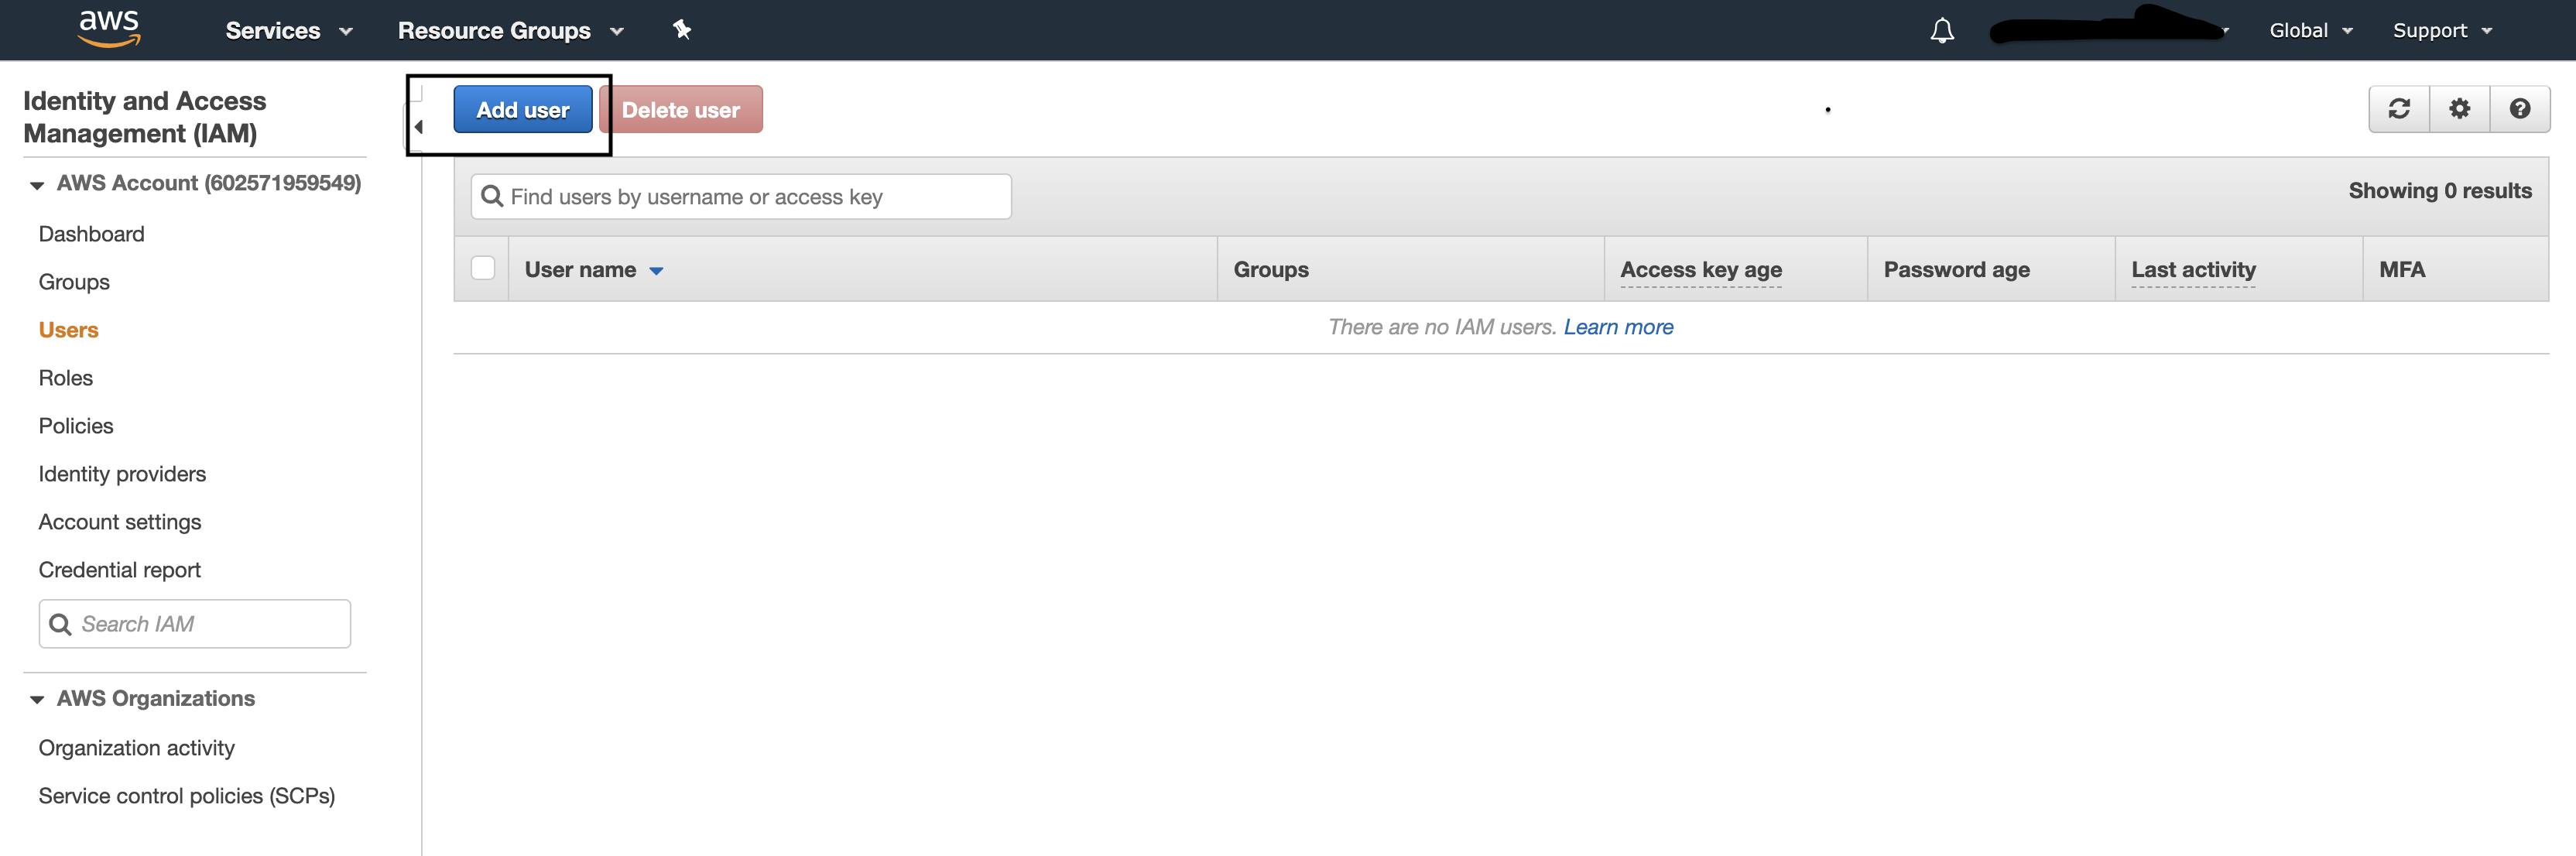
1. Add a user in AWS account:-
Let’s create a new user in AWS which we can use to configure in the jenkins. Login to your account and goto IAM console and click on “Add user”.
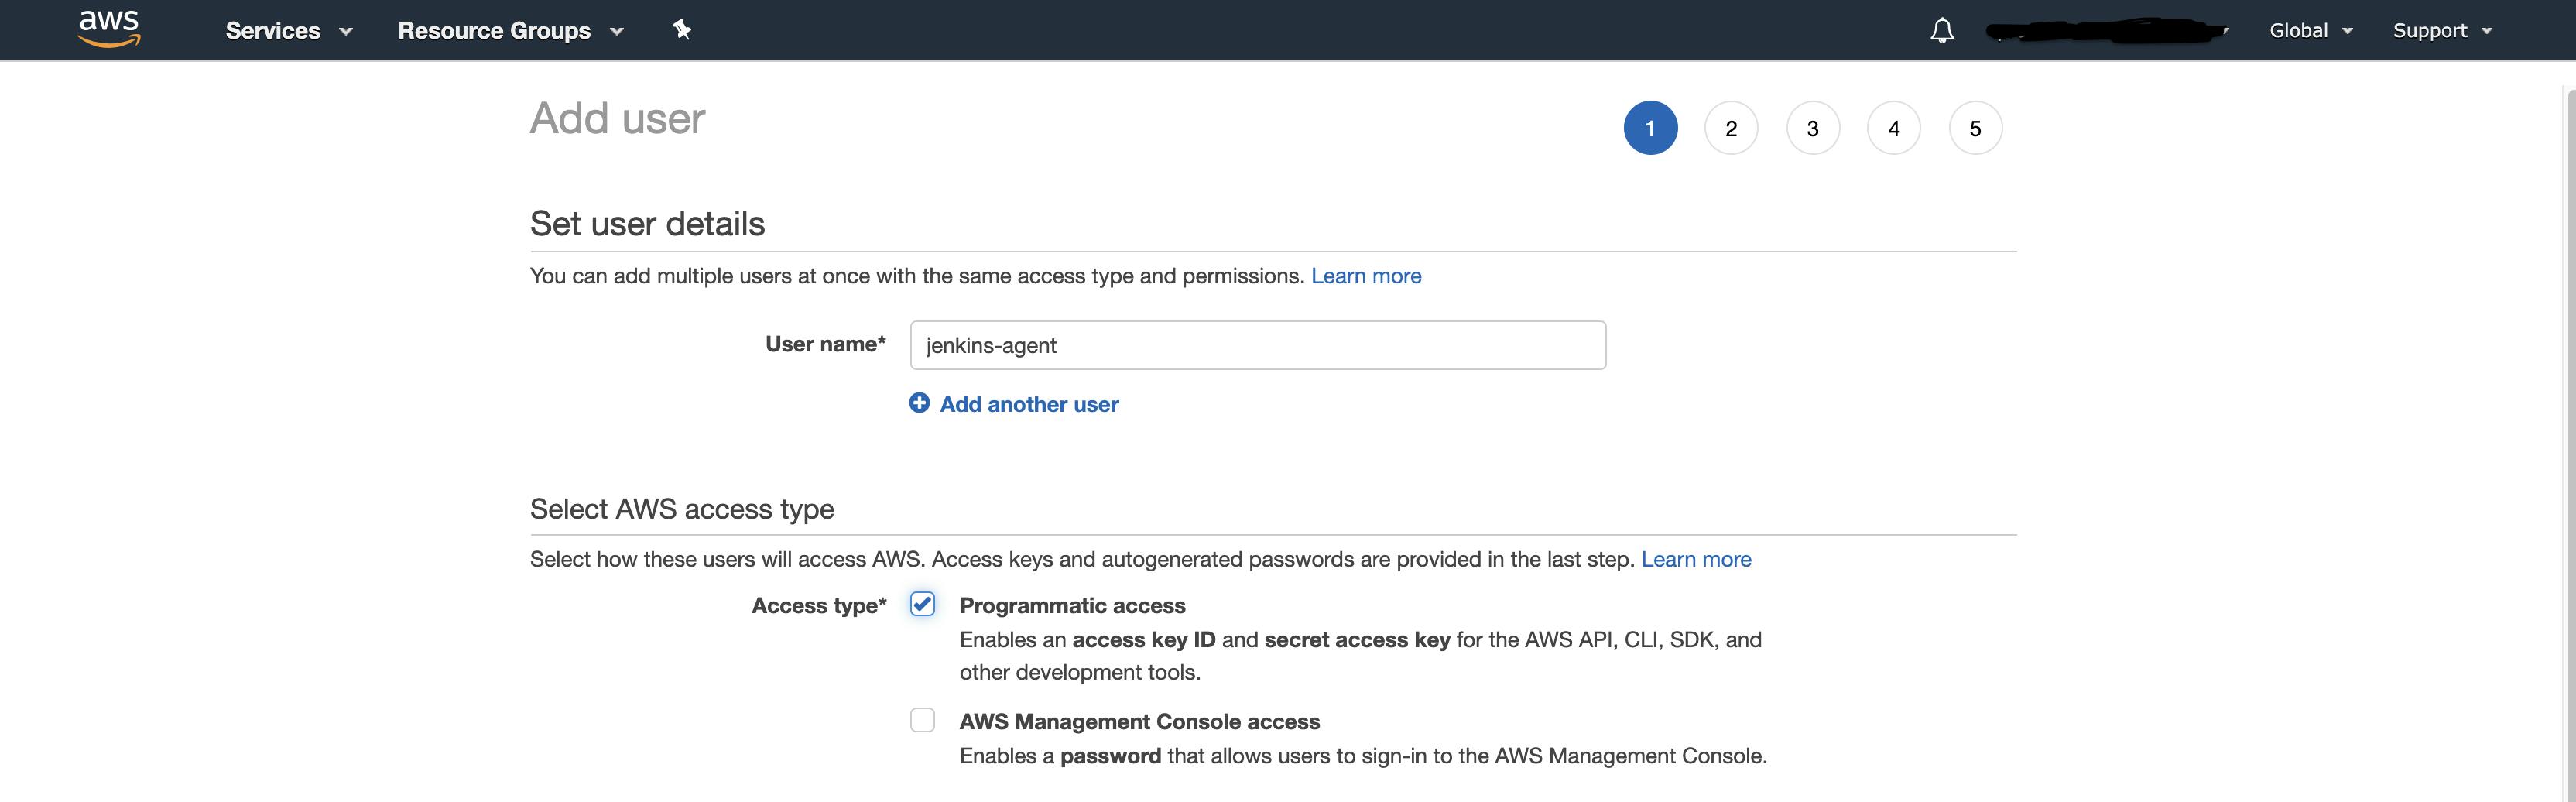
Now give the user name and the appropriate AWS access type. I am selecting Programmatic access here since we don’t want this user to login to console but programmatically work on the AWS resources.
Now set the permissions for the user, I am selecting the “AdministratorAccess” policy for the user which gives the Admin permissions. In an ideal case, give only permission which is required.

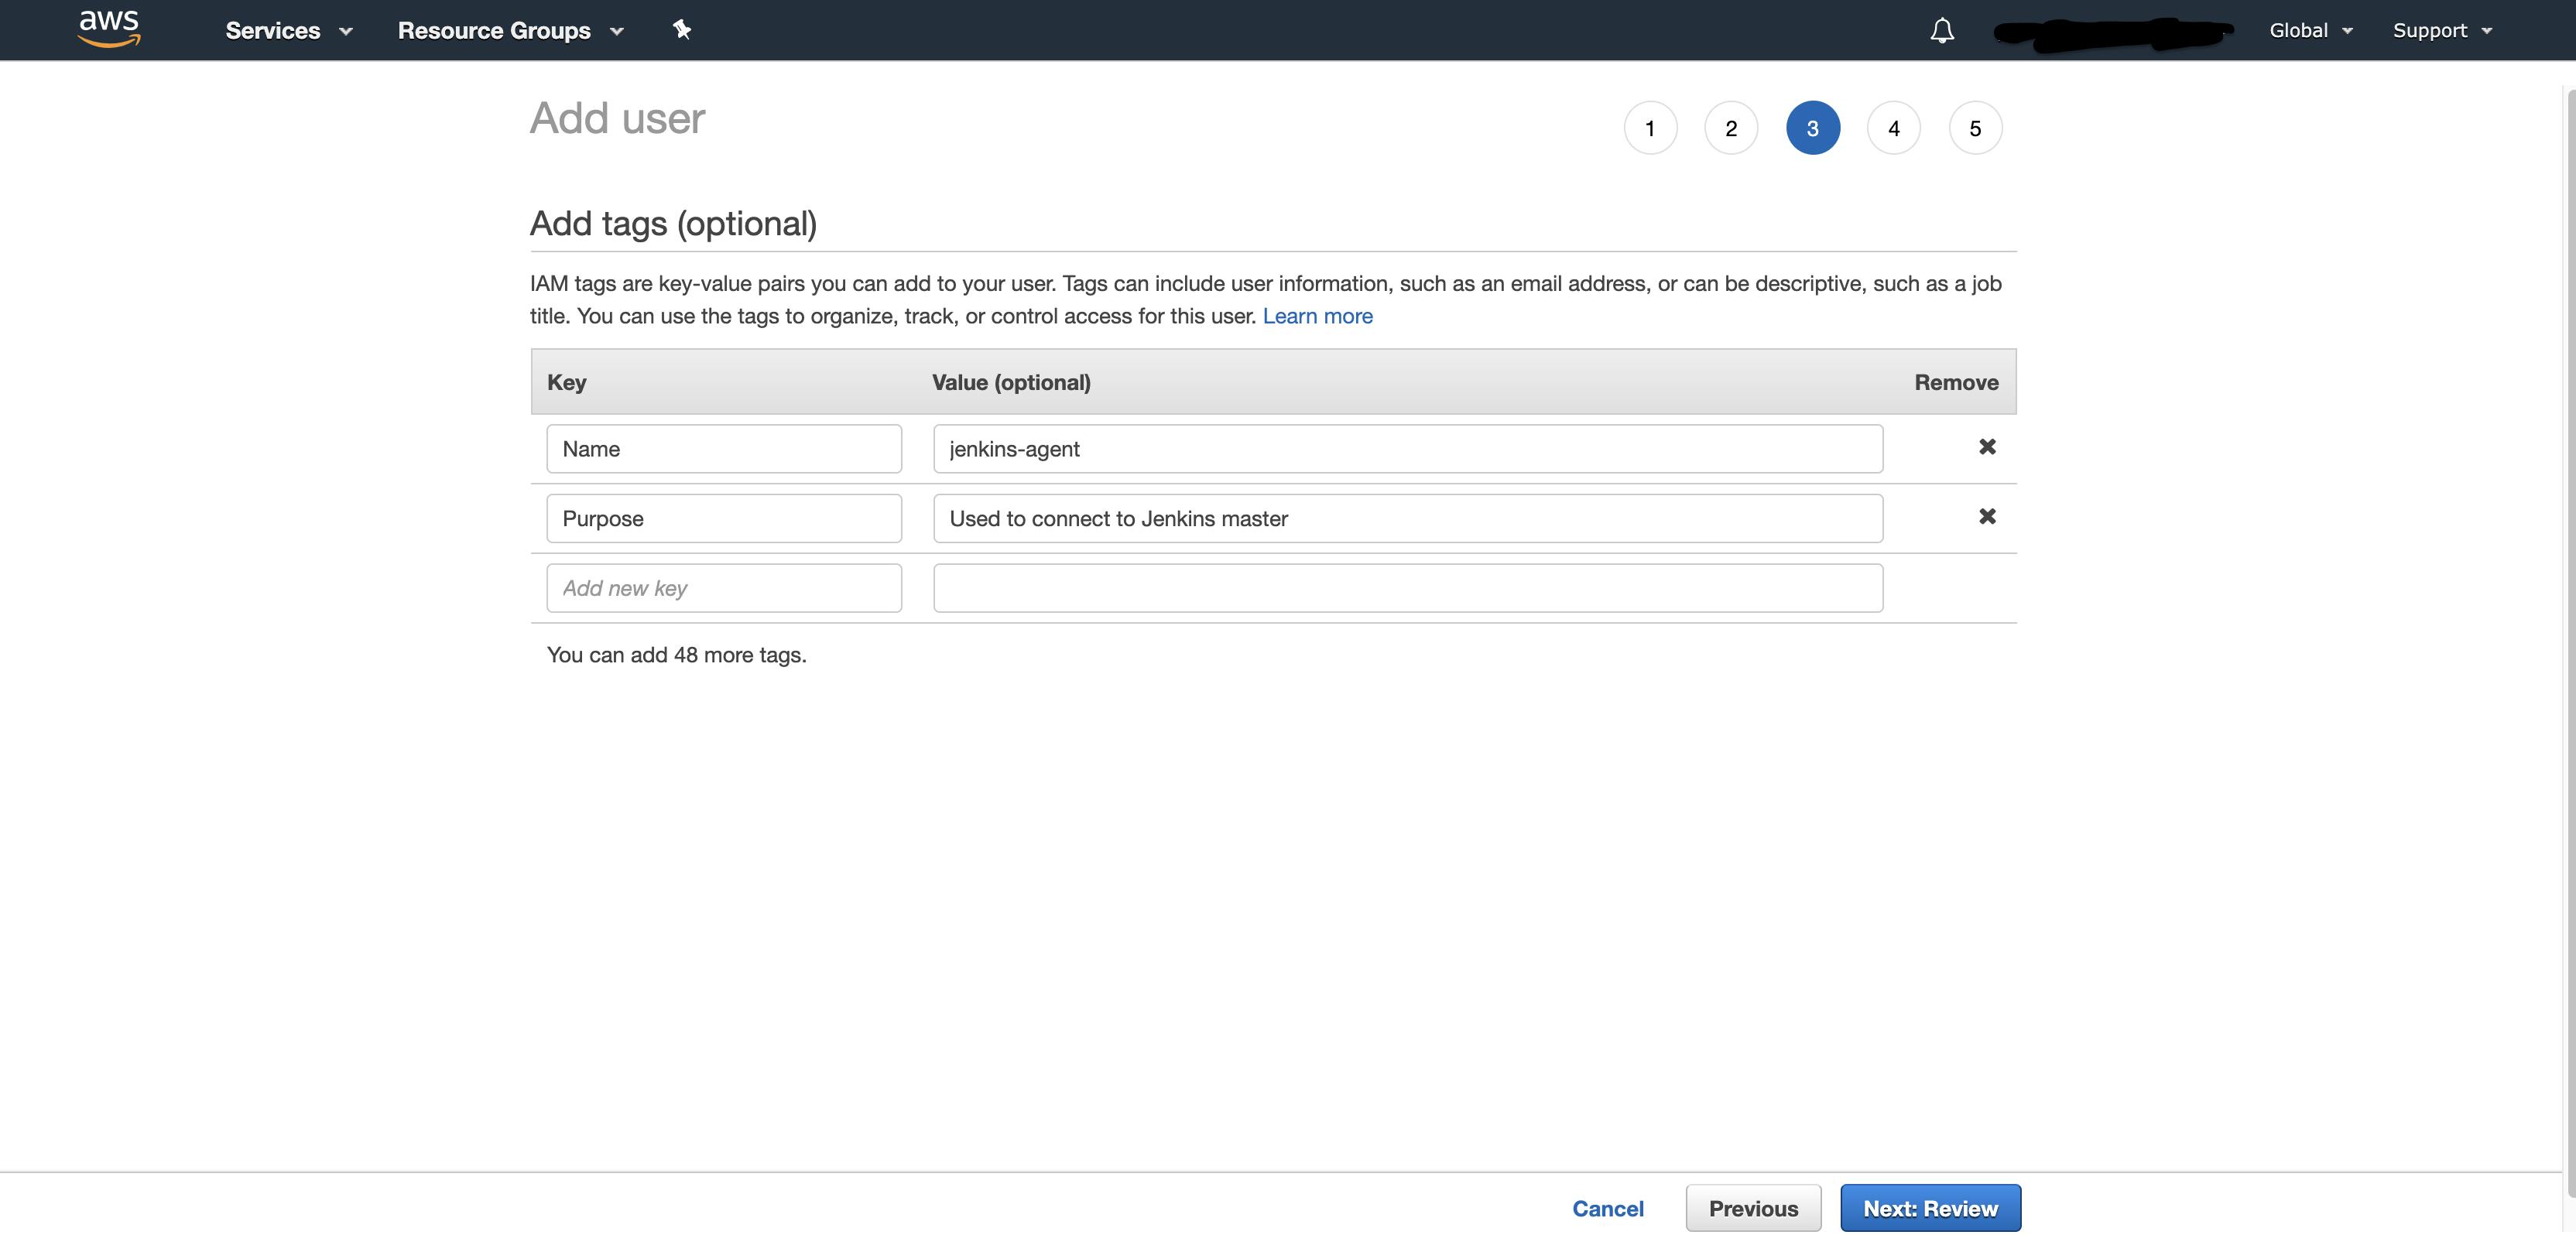
Next screen is adding tags. Add the tags to the user which tells some info about the user.
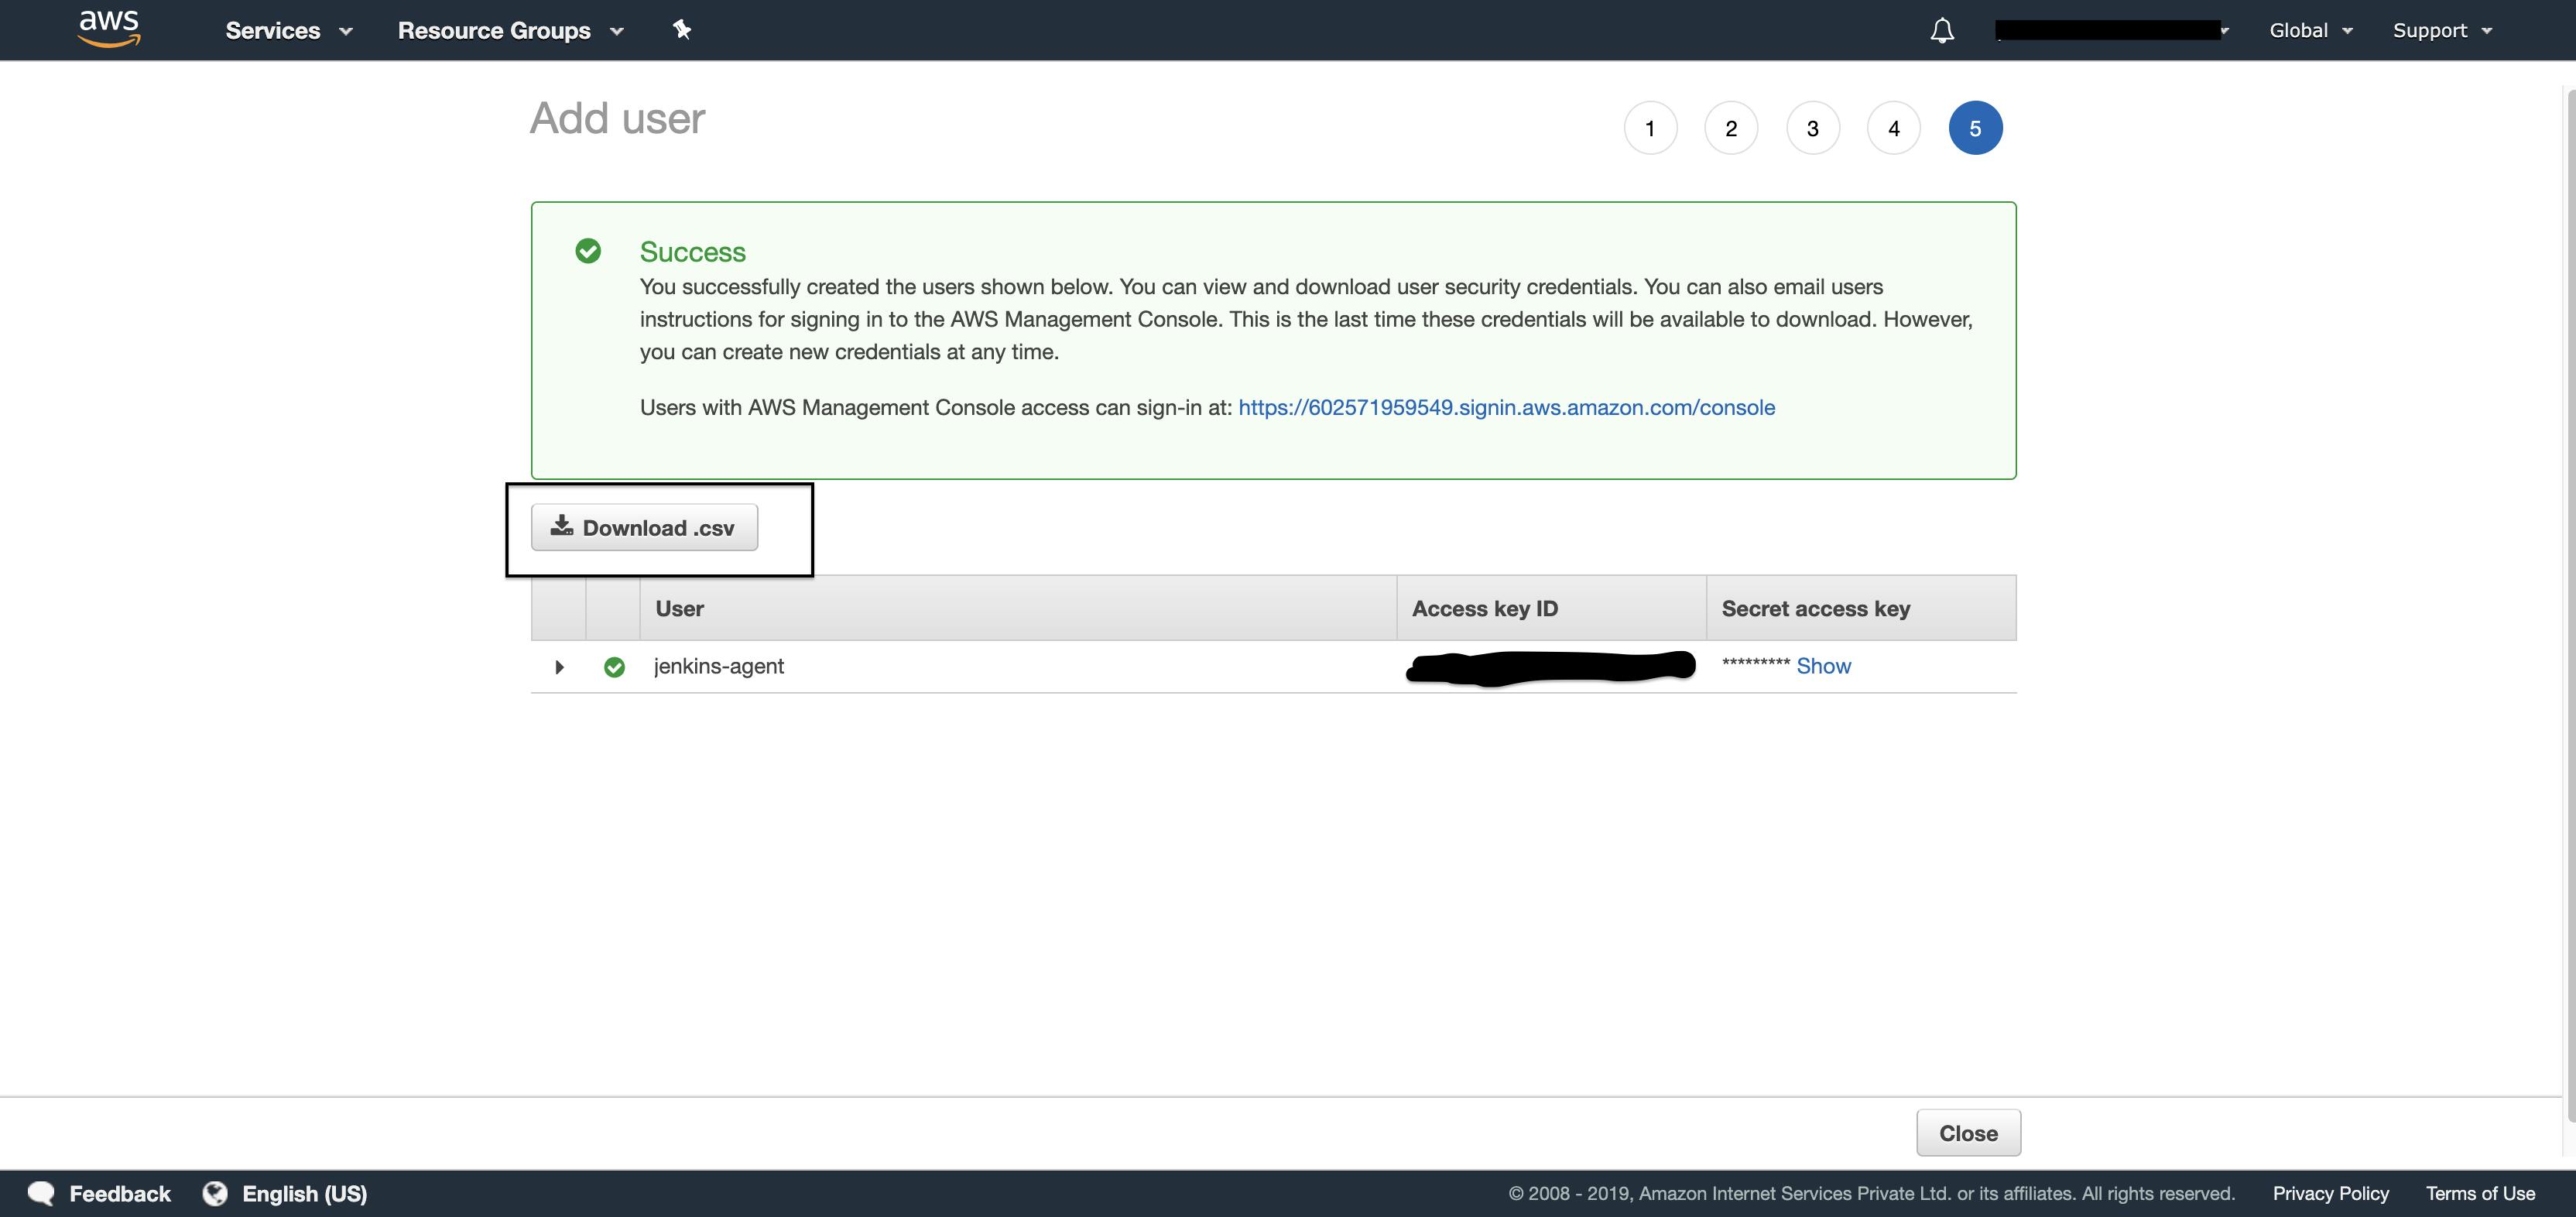
Now review the details and click on “Create User”

Once the user is created successfully, you can download the user credentials which will not be available once this screen is gone. These credentials will be used while configuring Amazon EC2 in Jenkins.
2. Add Key Pair in EC2 console
Now lets create key pair which is required to configure Amazon EC2 plugin in Jenkins.
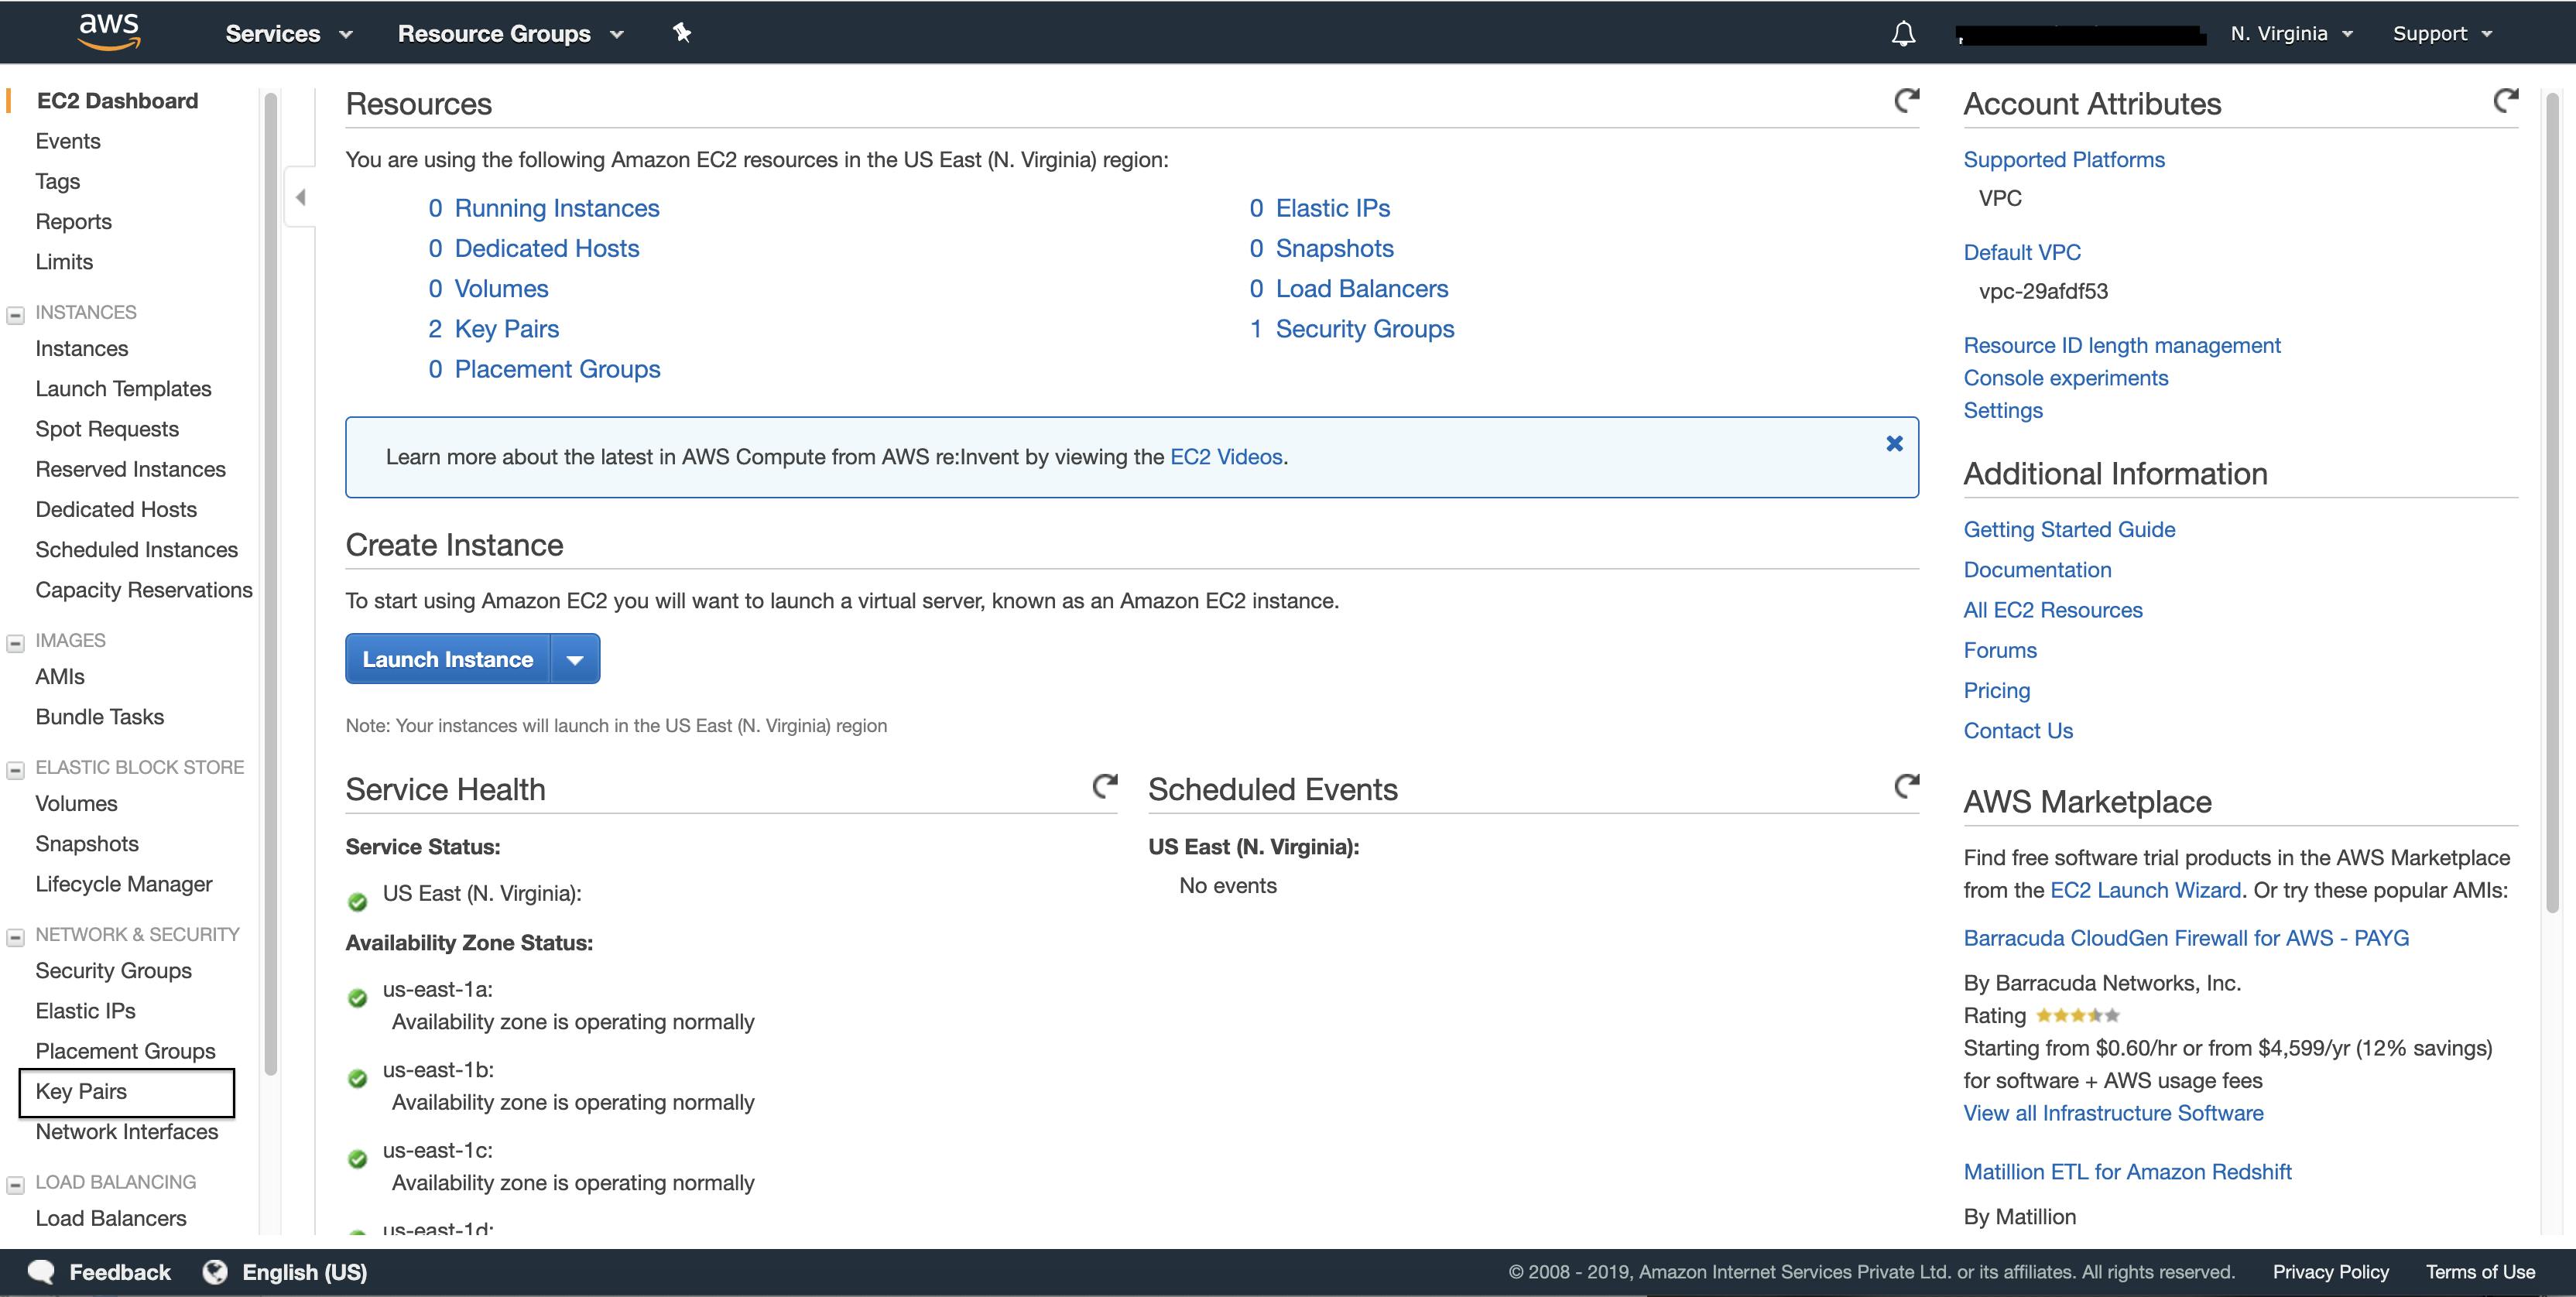
Goto EC2 console , Under “Network & Security”, click on “Key Pairs”
Click on “Create Key Pair” and give a name for the key pair.
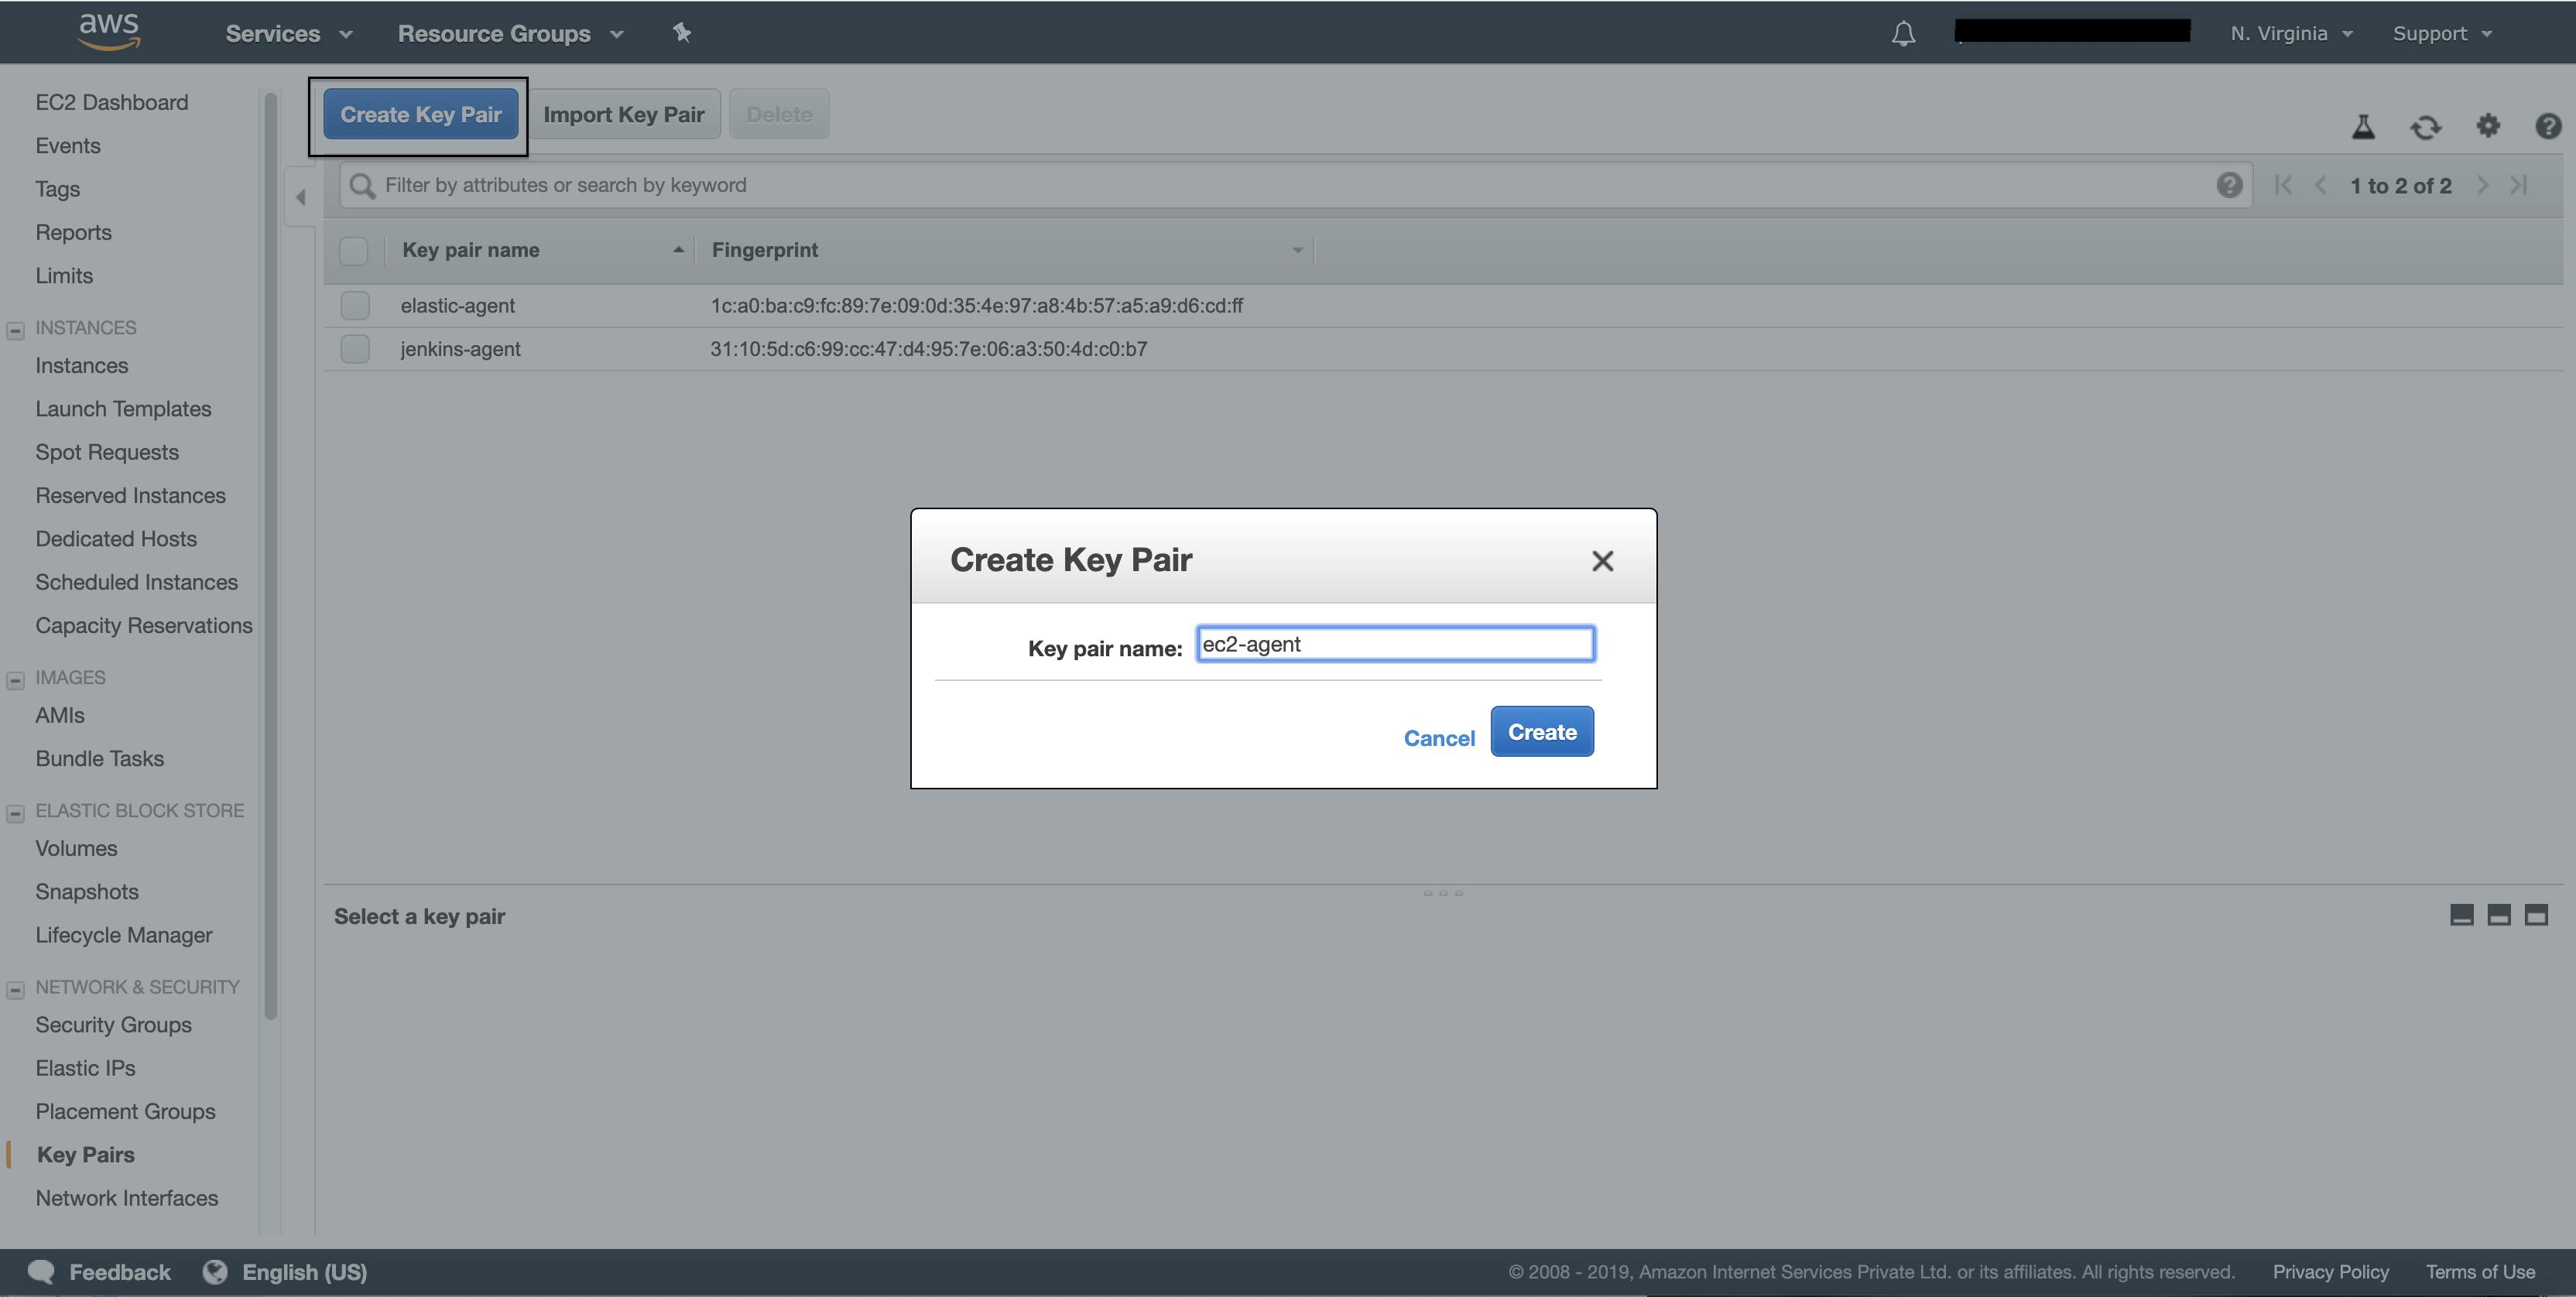
Click on create and the private key gets downloaded. We will use this private key in jenkins configuration.
3. Security groups
Let’s modify the default security group to allow ssh port 22 for jenkins master be able connect to slave through ssh protocol.
Goto EC2 console , Under “Network & Security”, click on “Security Groups”.

Goto Inbound tab in the security group details and add new rule for ssh port, save it.
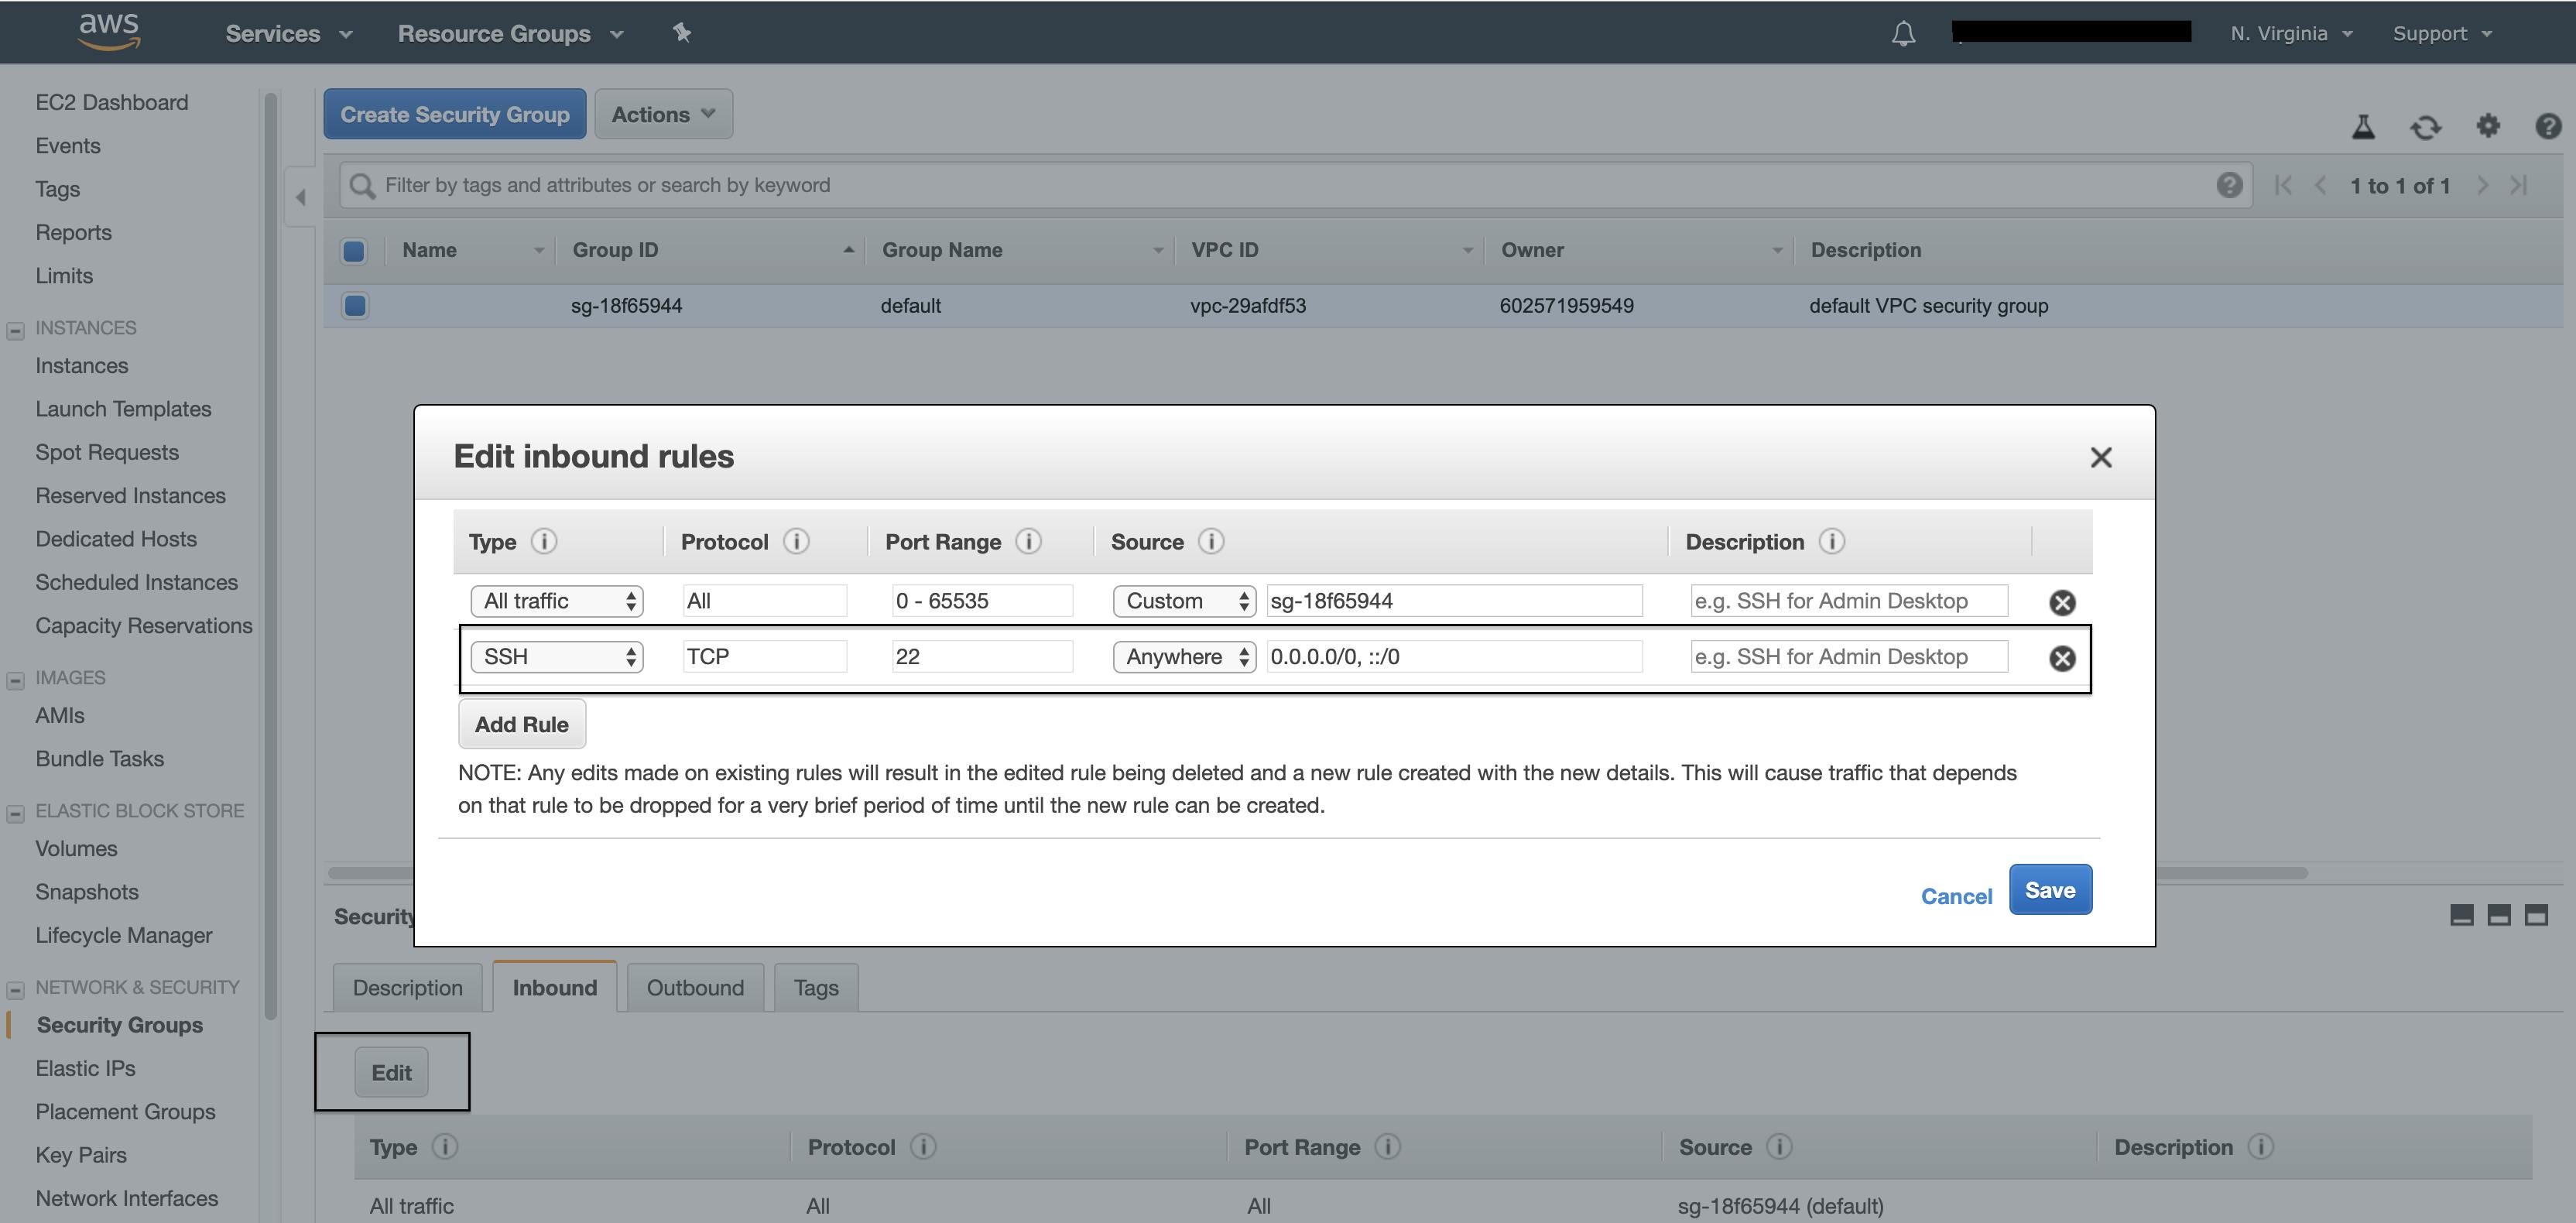
Ideally, we should create a new security group and give the Jenkins master IP address in source and add the ssh rule.
4. Install Amazon EC2 plugin
Now let’s install the Amazon EC2 plugin in jenkins.
Goto Manage Jenkins → Manage Plugins
Click on Available Tab and enter “Amazon EC2” in the search bar.
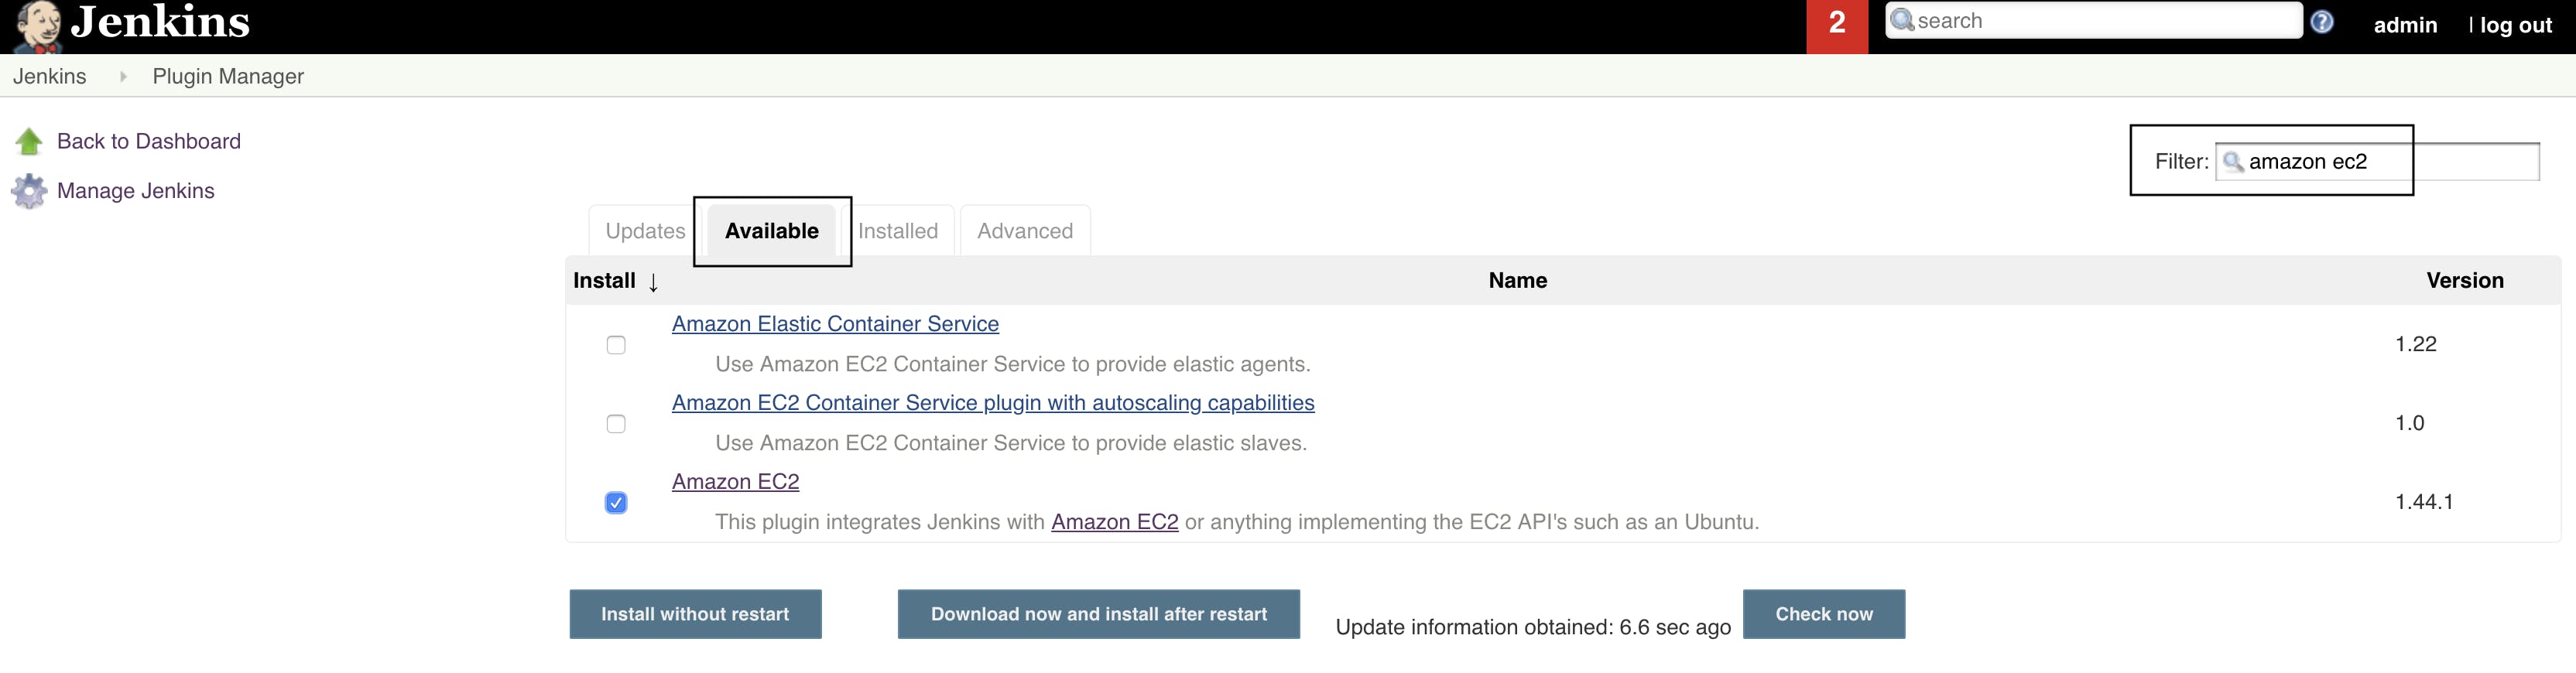
Click on Install without restart.
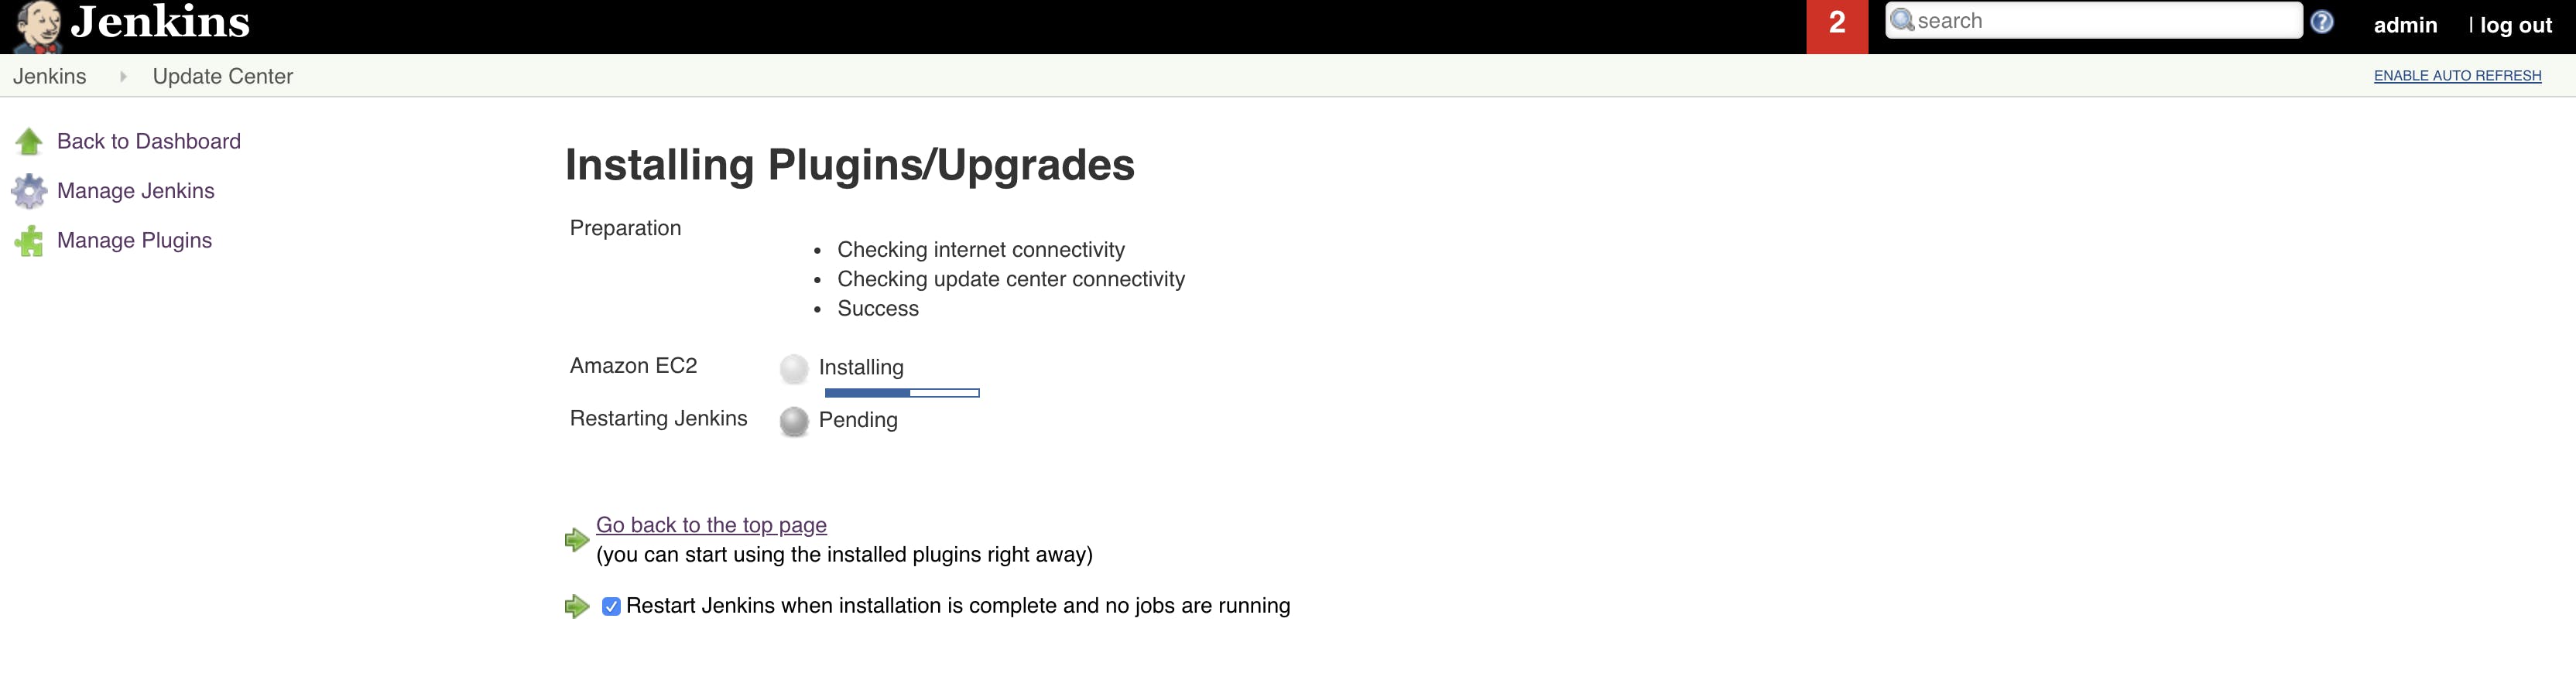
Also it is better to restart the jenkins after the installation by selecting the option as in the above screenshot.
5. Configure amazon EC2 plugin
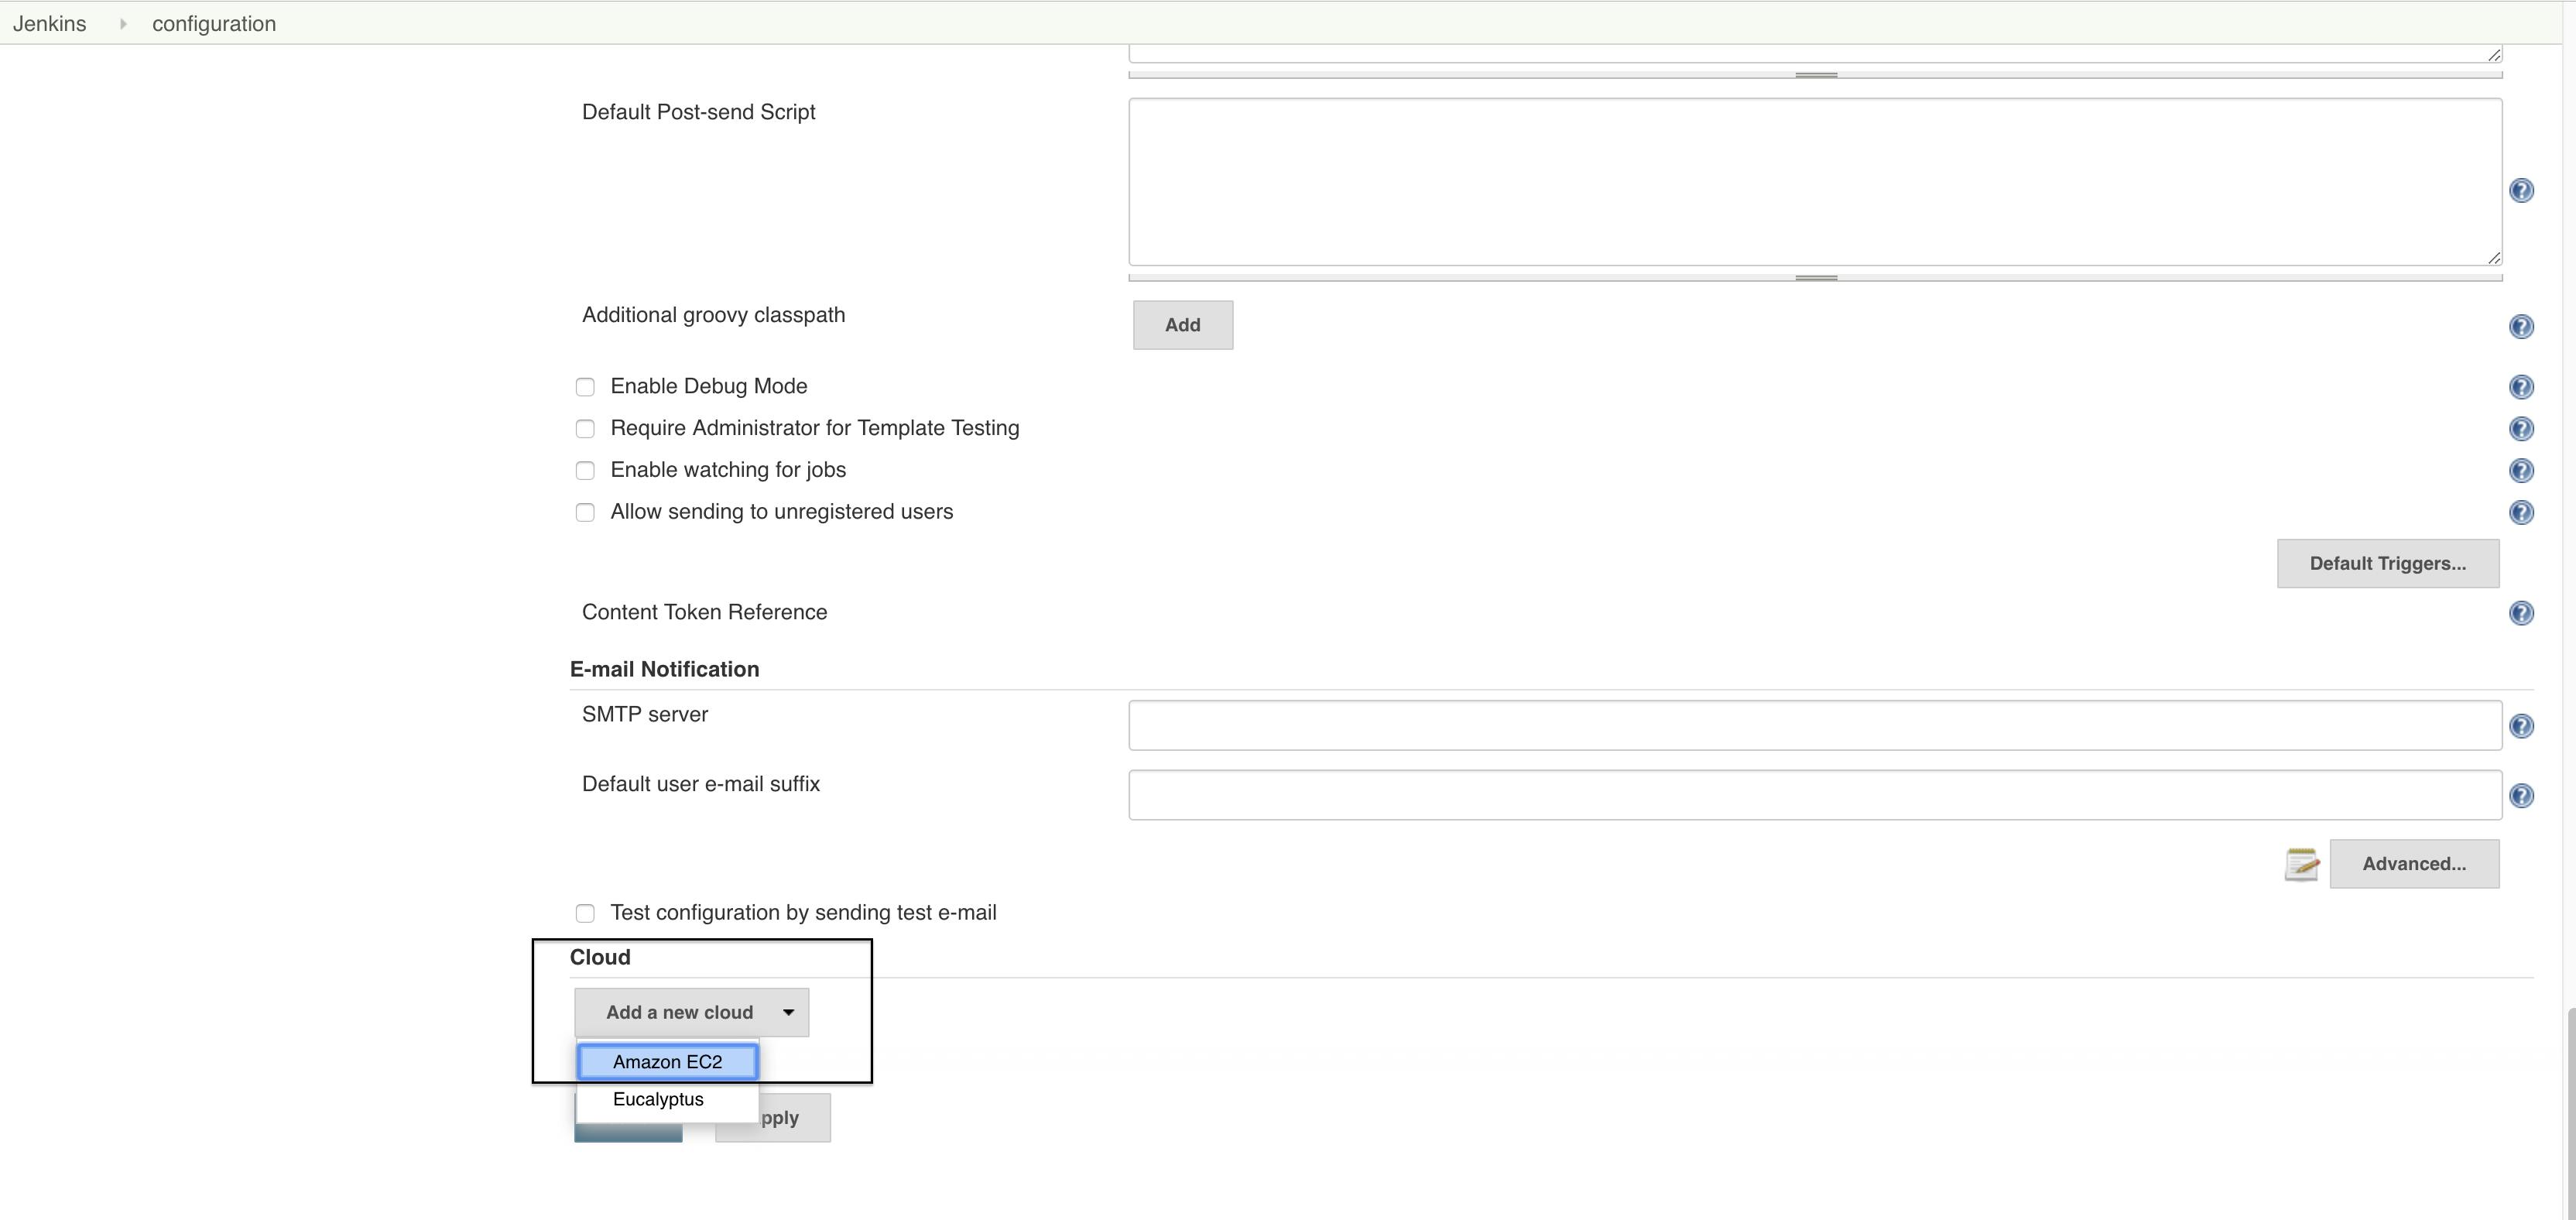
Once the plugin is installed successfully, login to Jenkins and navigate to Manage Jenkins → Configure System. Or you can achieve this by just appending /configure to jenkins base URL in the address bar.
Now find “Add a new Cloud” in the “Cloud” section in the configuration page. and select “Amazon EC2” from the drop-down list.
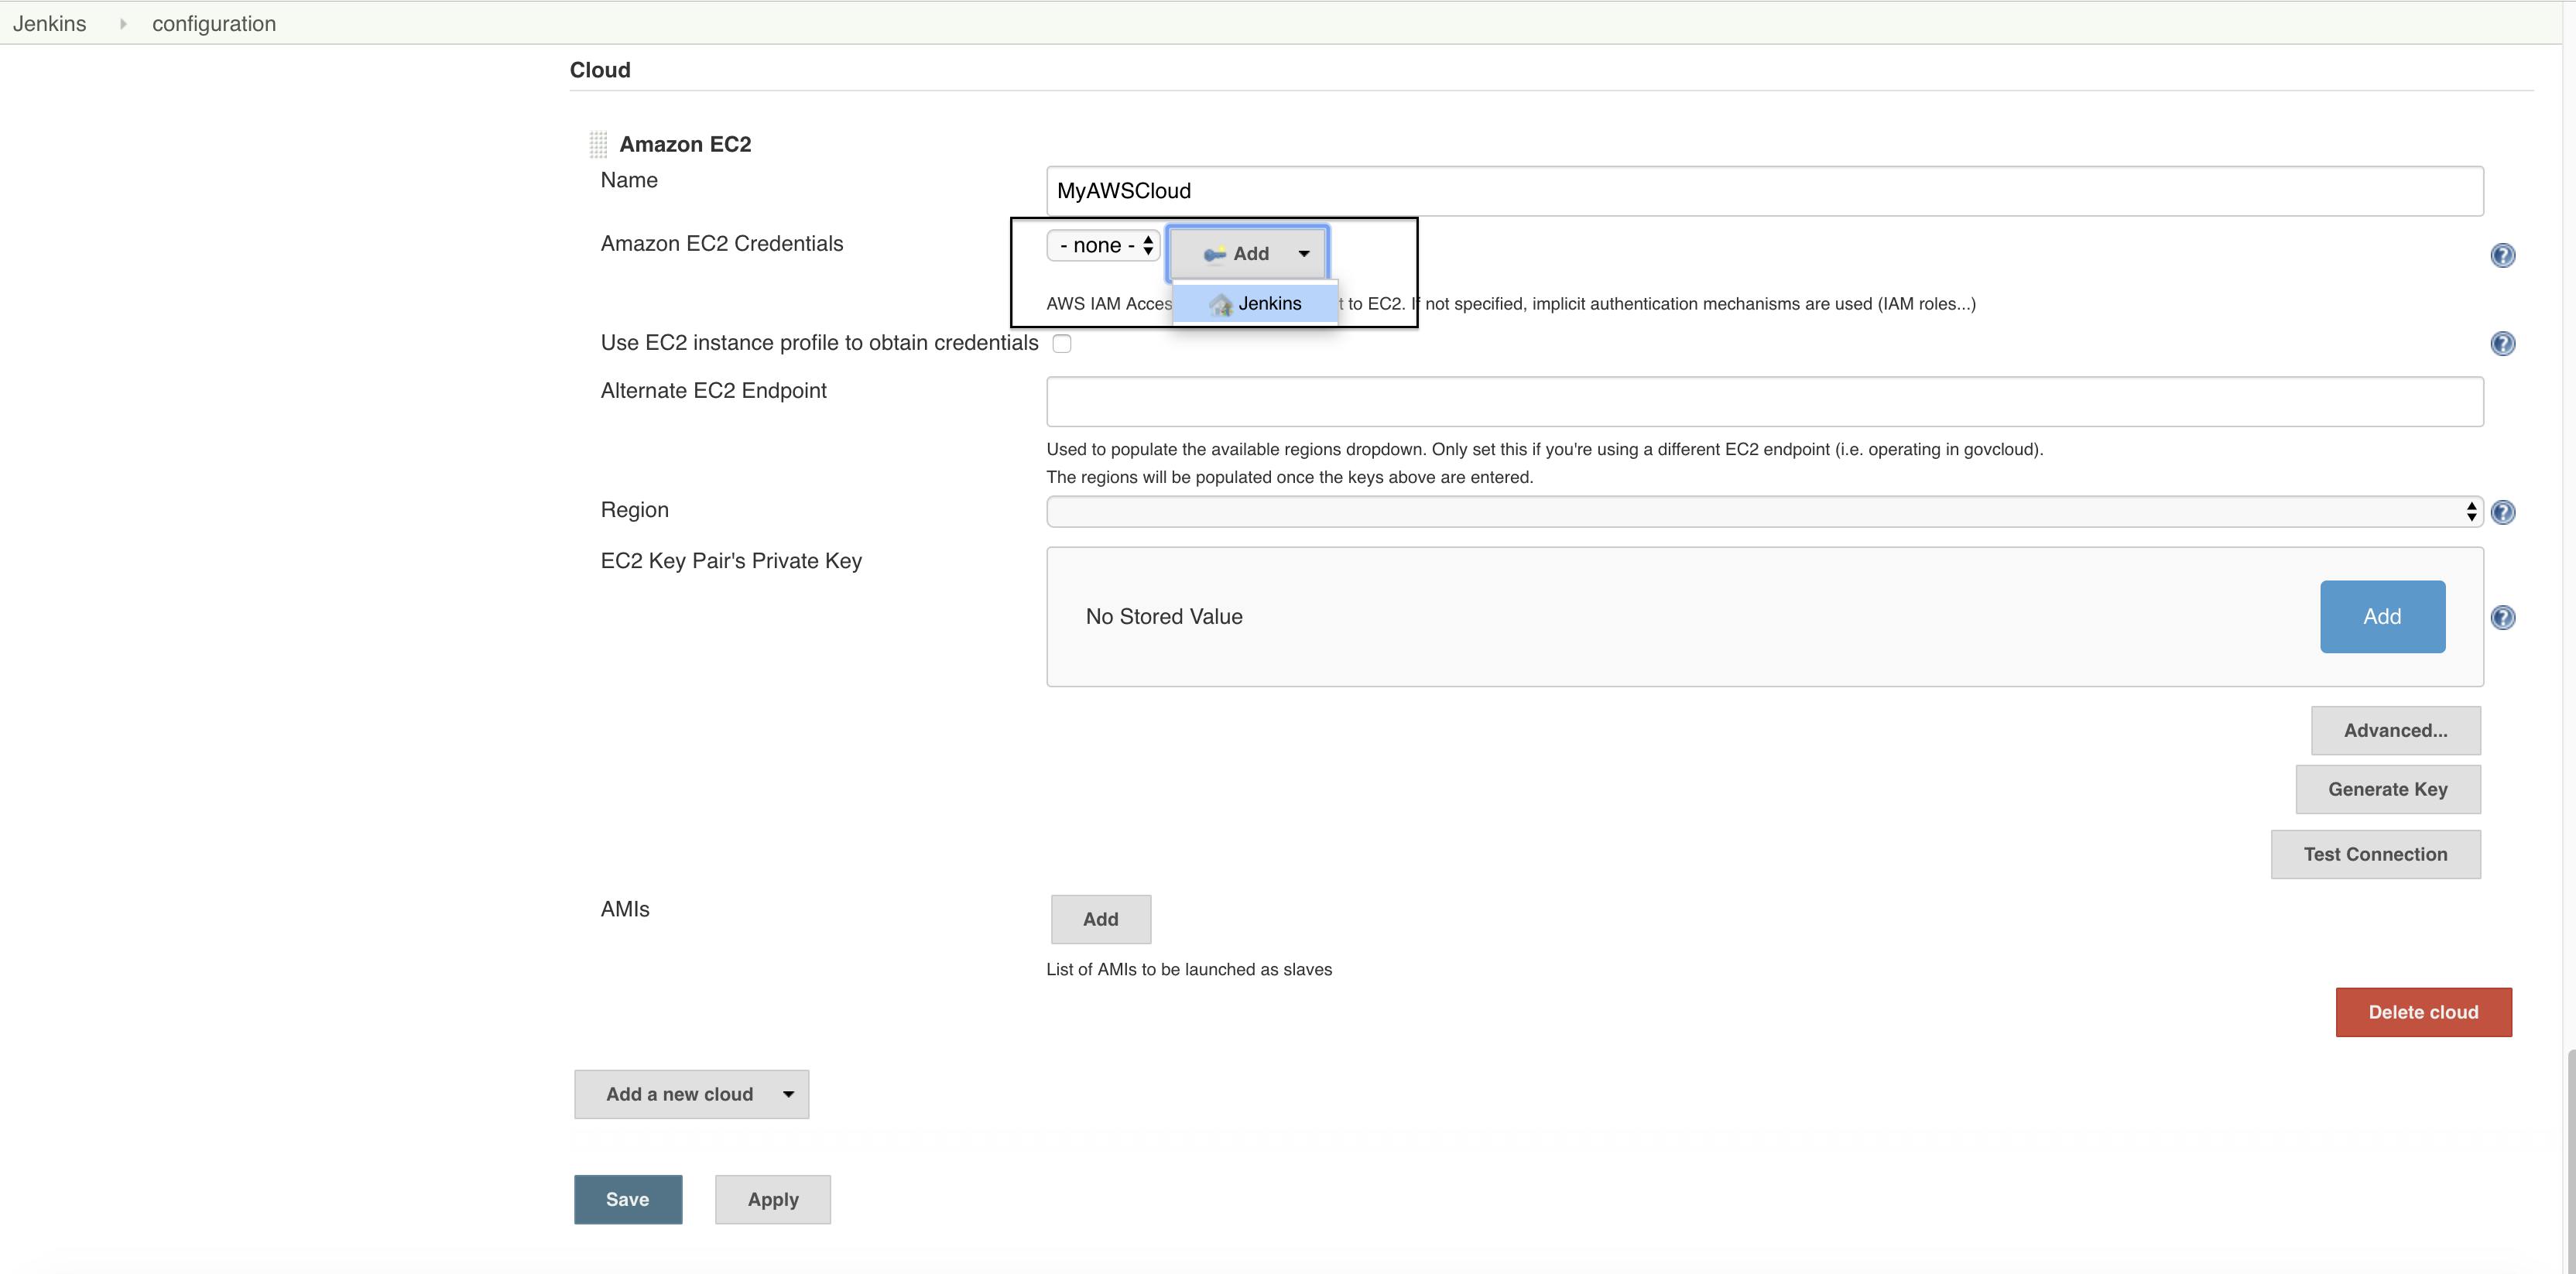
Now we need to provide some details like Name, Amazon EC2 credentials etc.
To enter the aws ec2 credentials click on “Add” and select “Jenkins”
A new window will appear, enter the details in this window.
Select the Kind as “AWS Credentials”, Scope as “Global”. Enter the access key ID, the secret access key, ID, description. Click on Add.
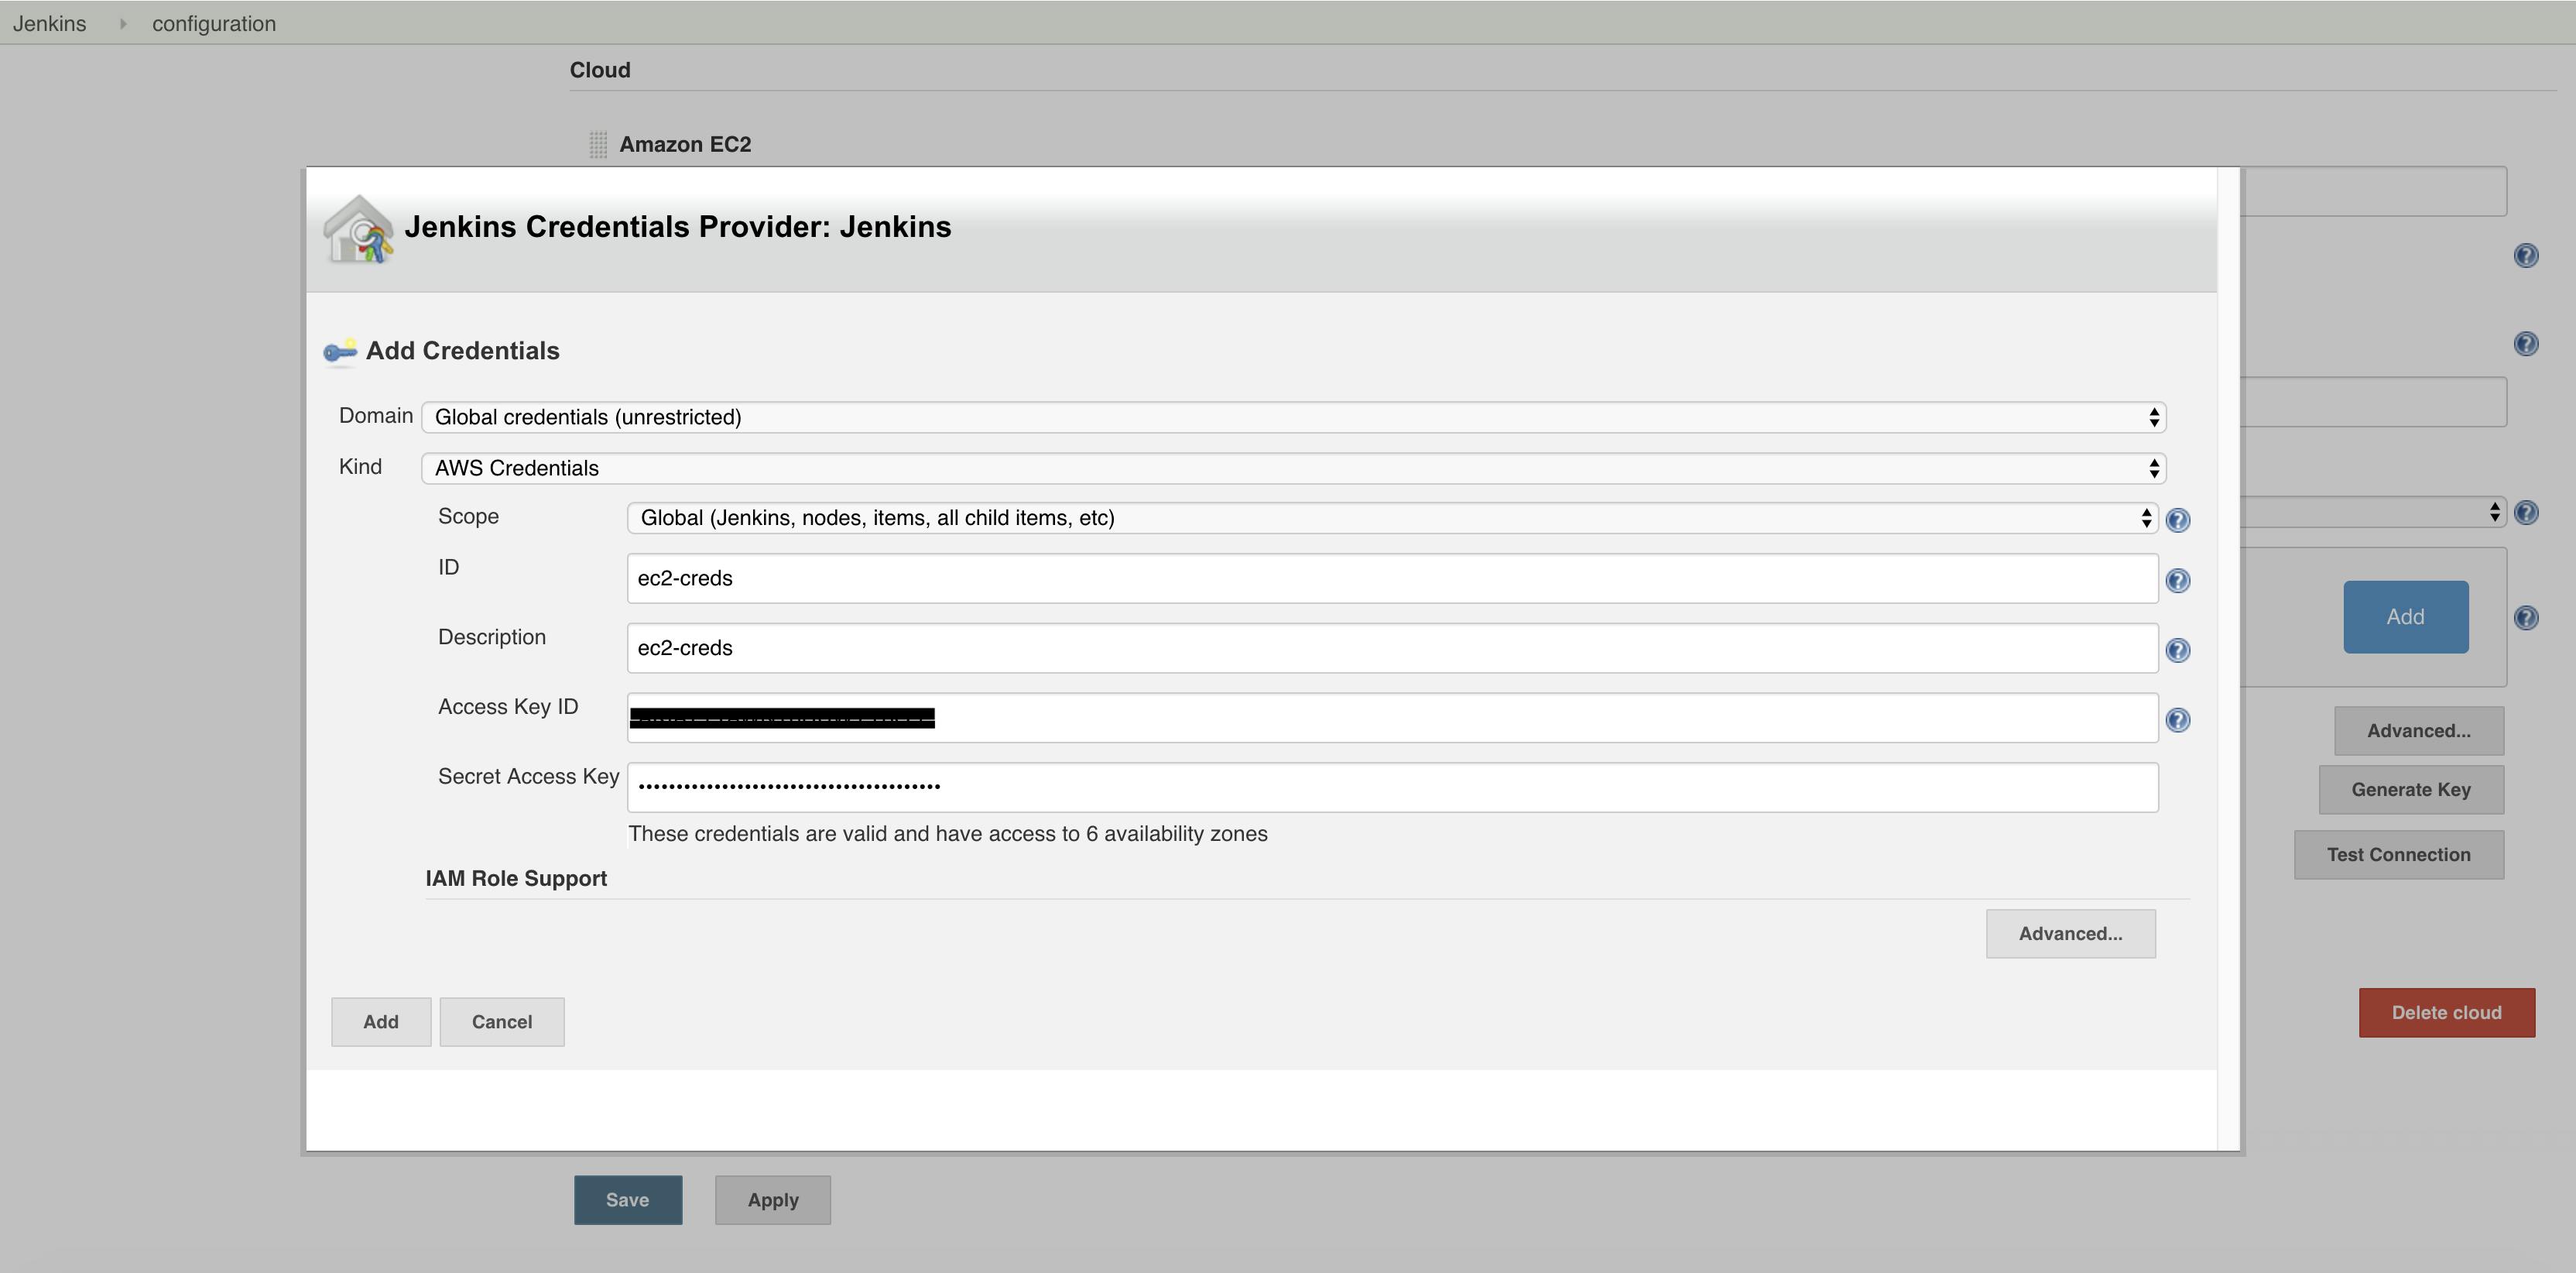
Now select the appropriate region where you want to get slaves created by jenkins. Provide the private key of the EC2 key pair which we have created in the 2nd step.
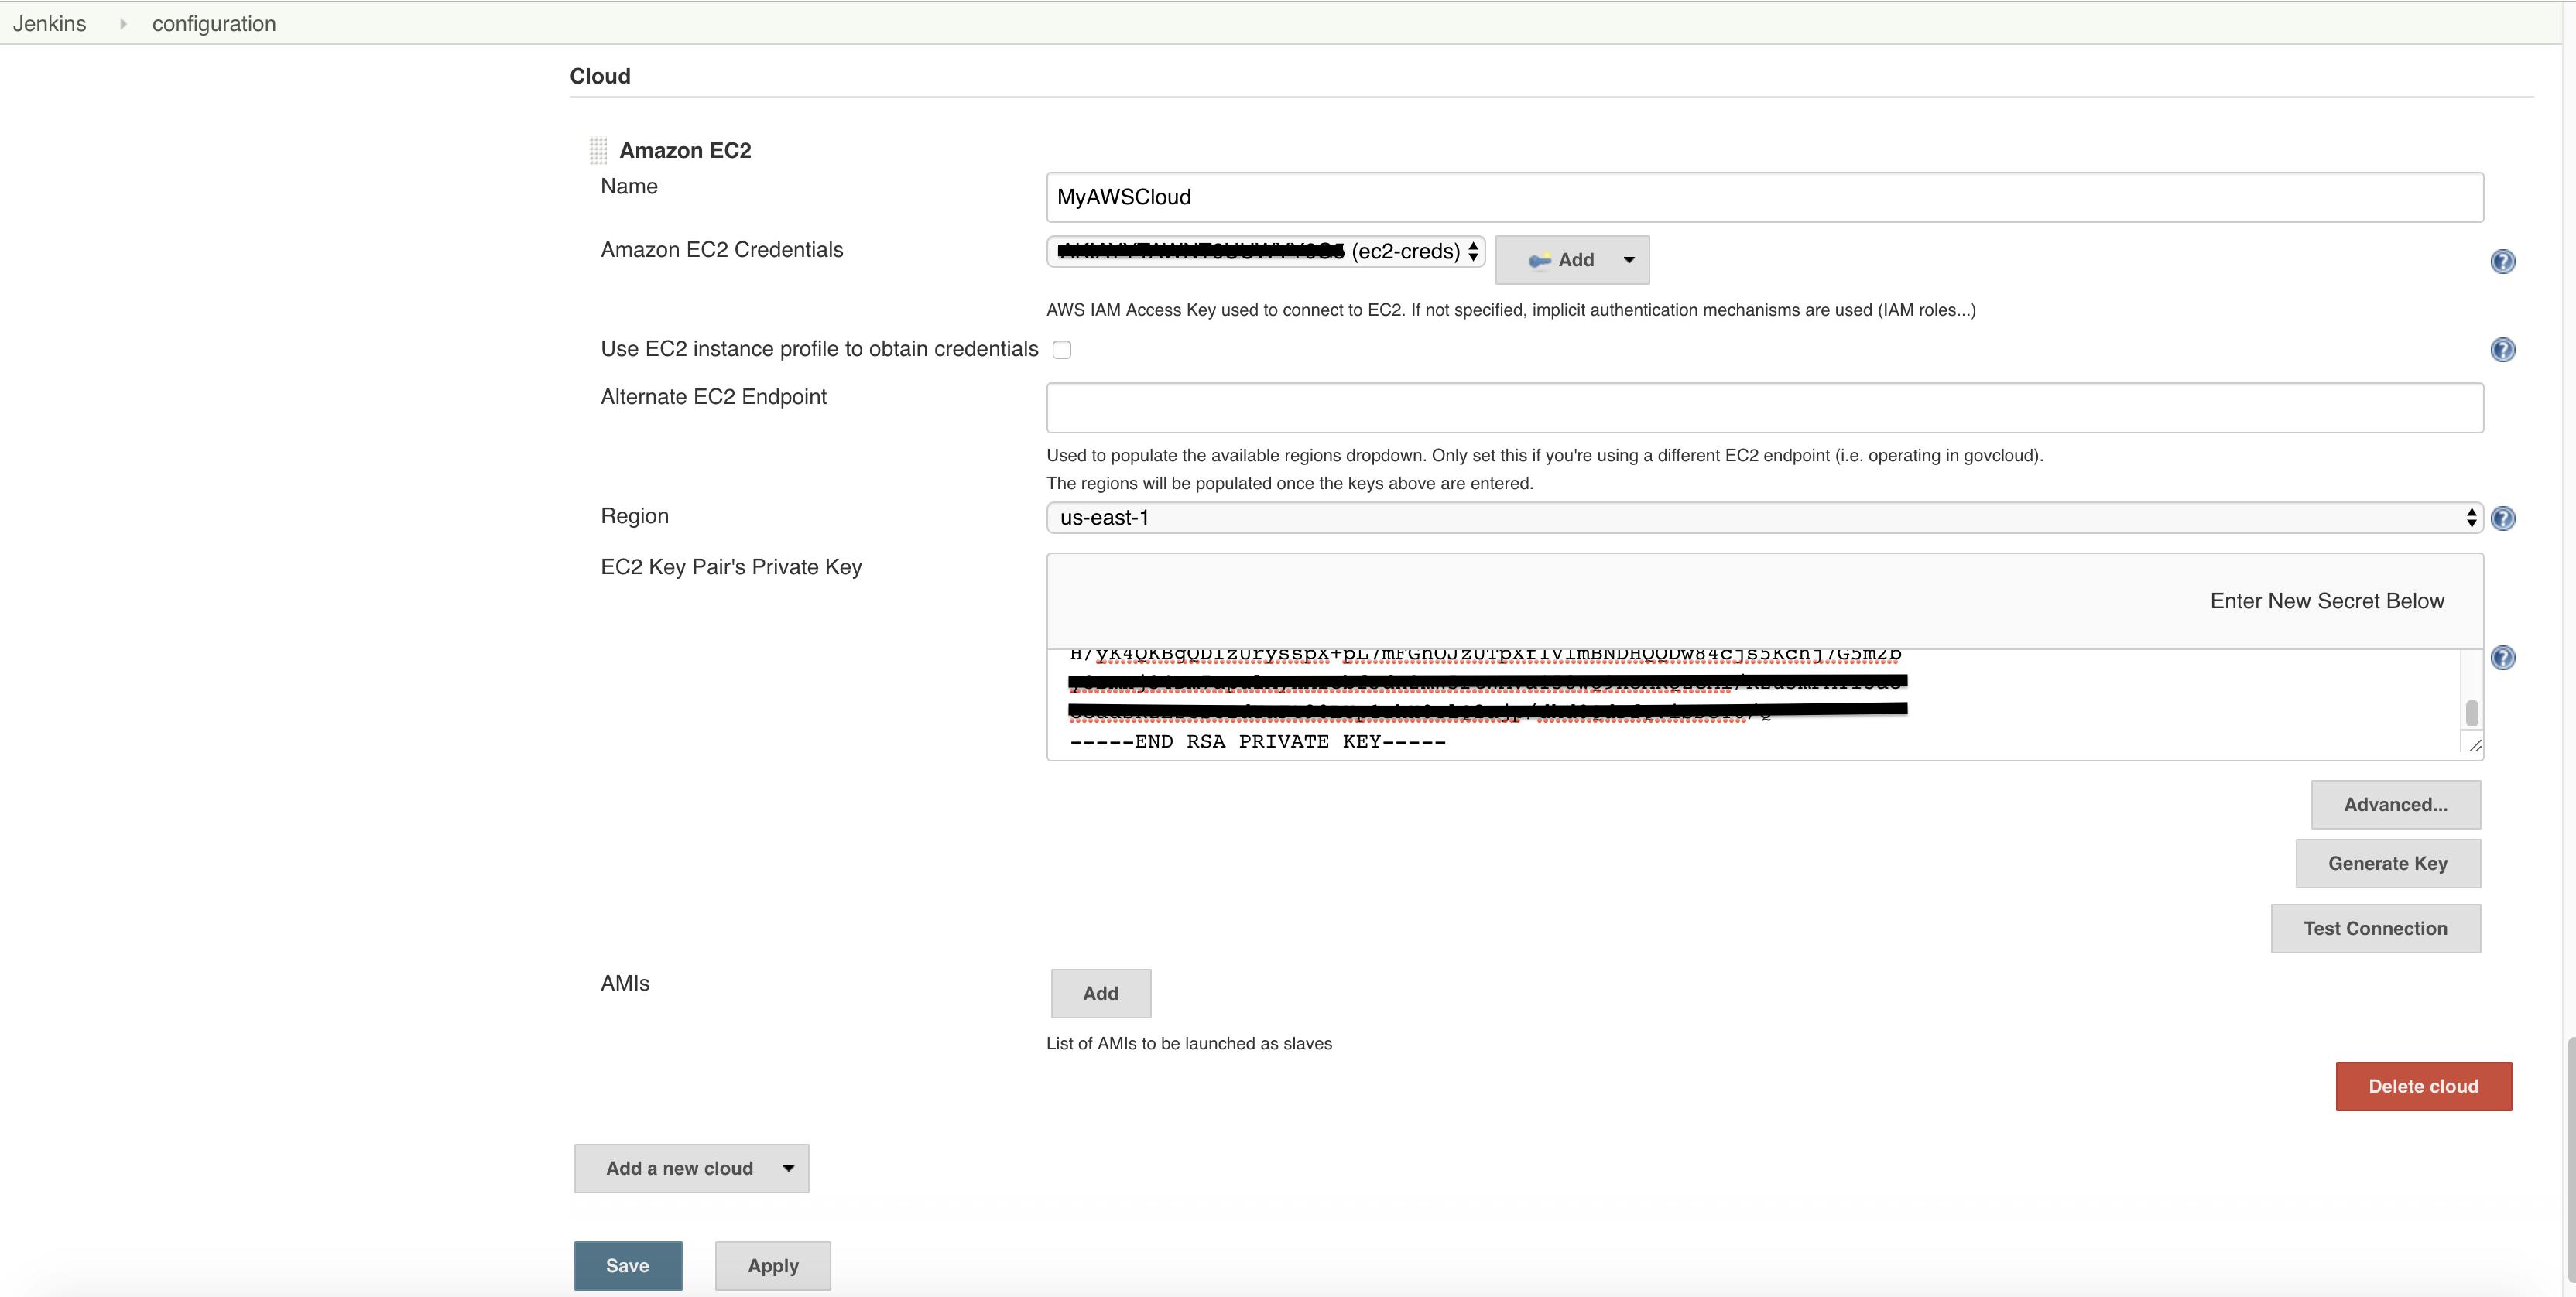
Click on “Test Connection” and make sure it is “Success”.
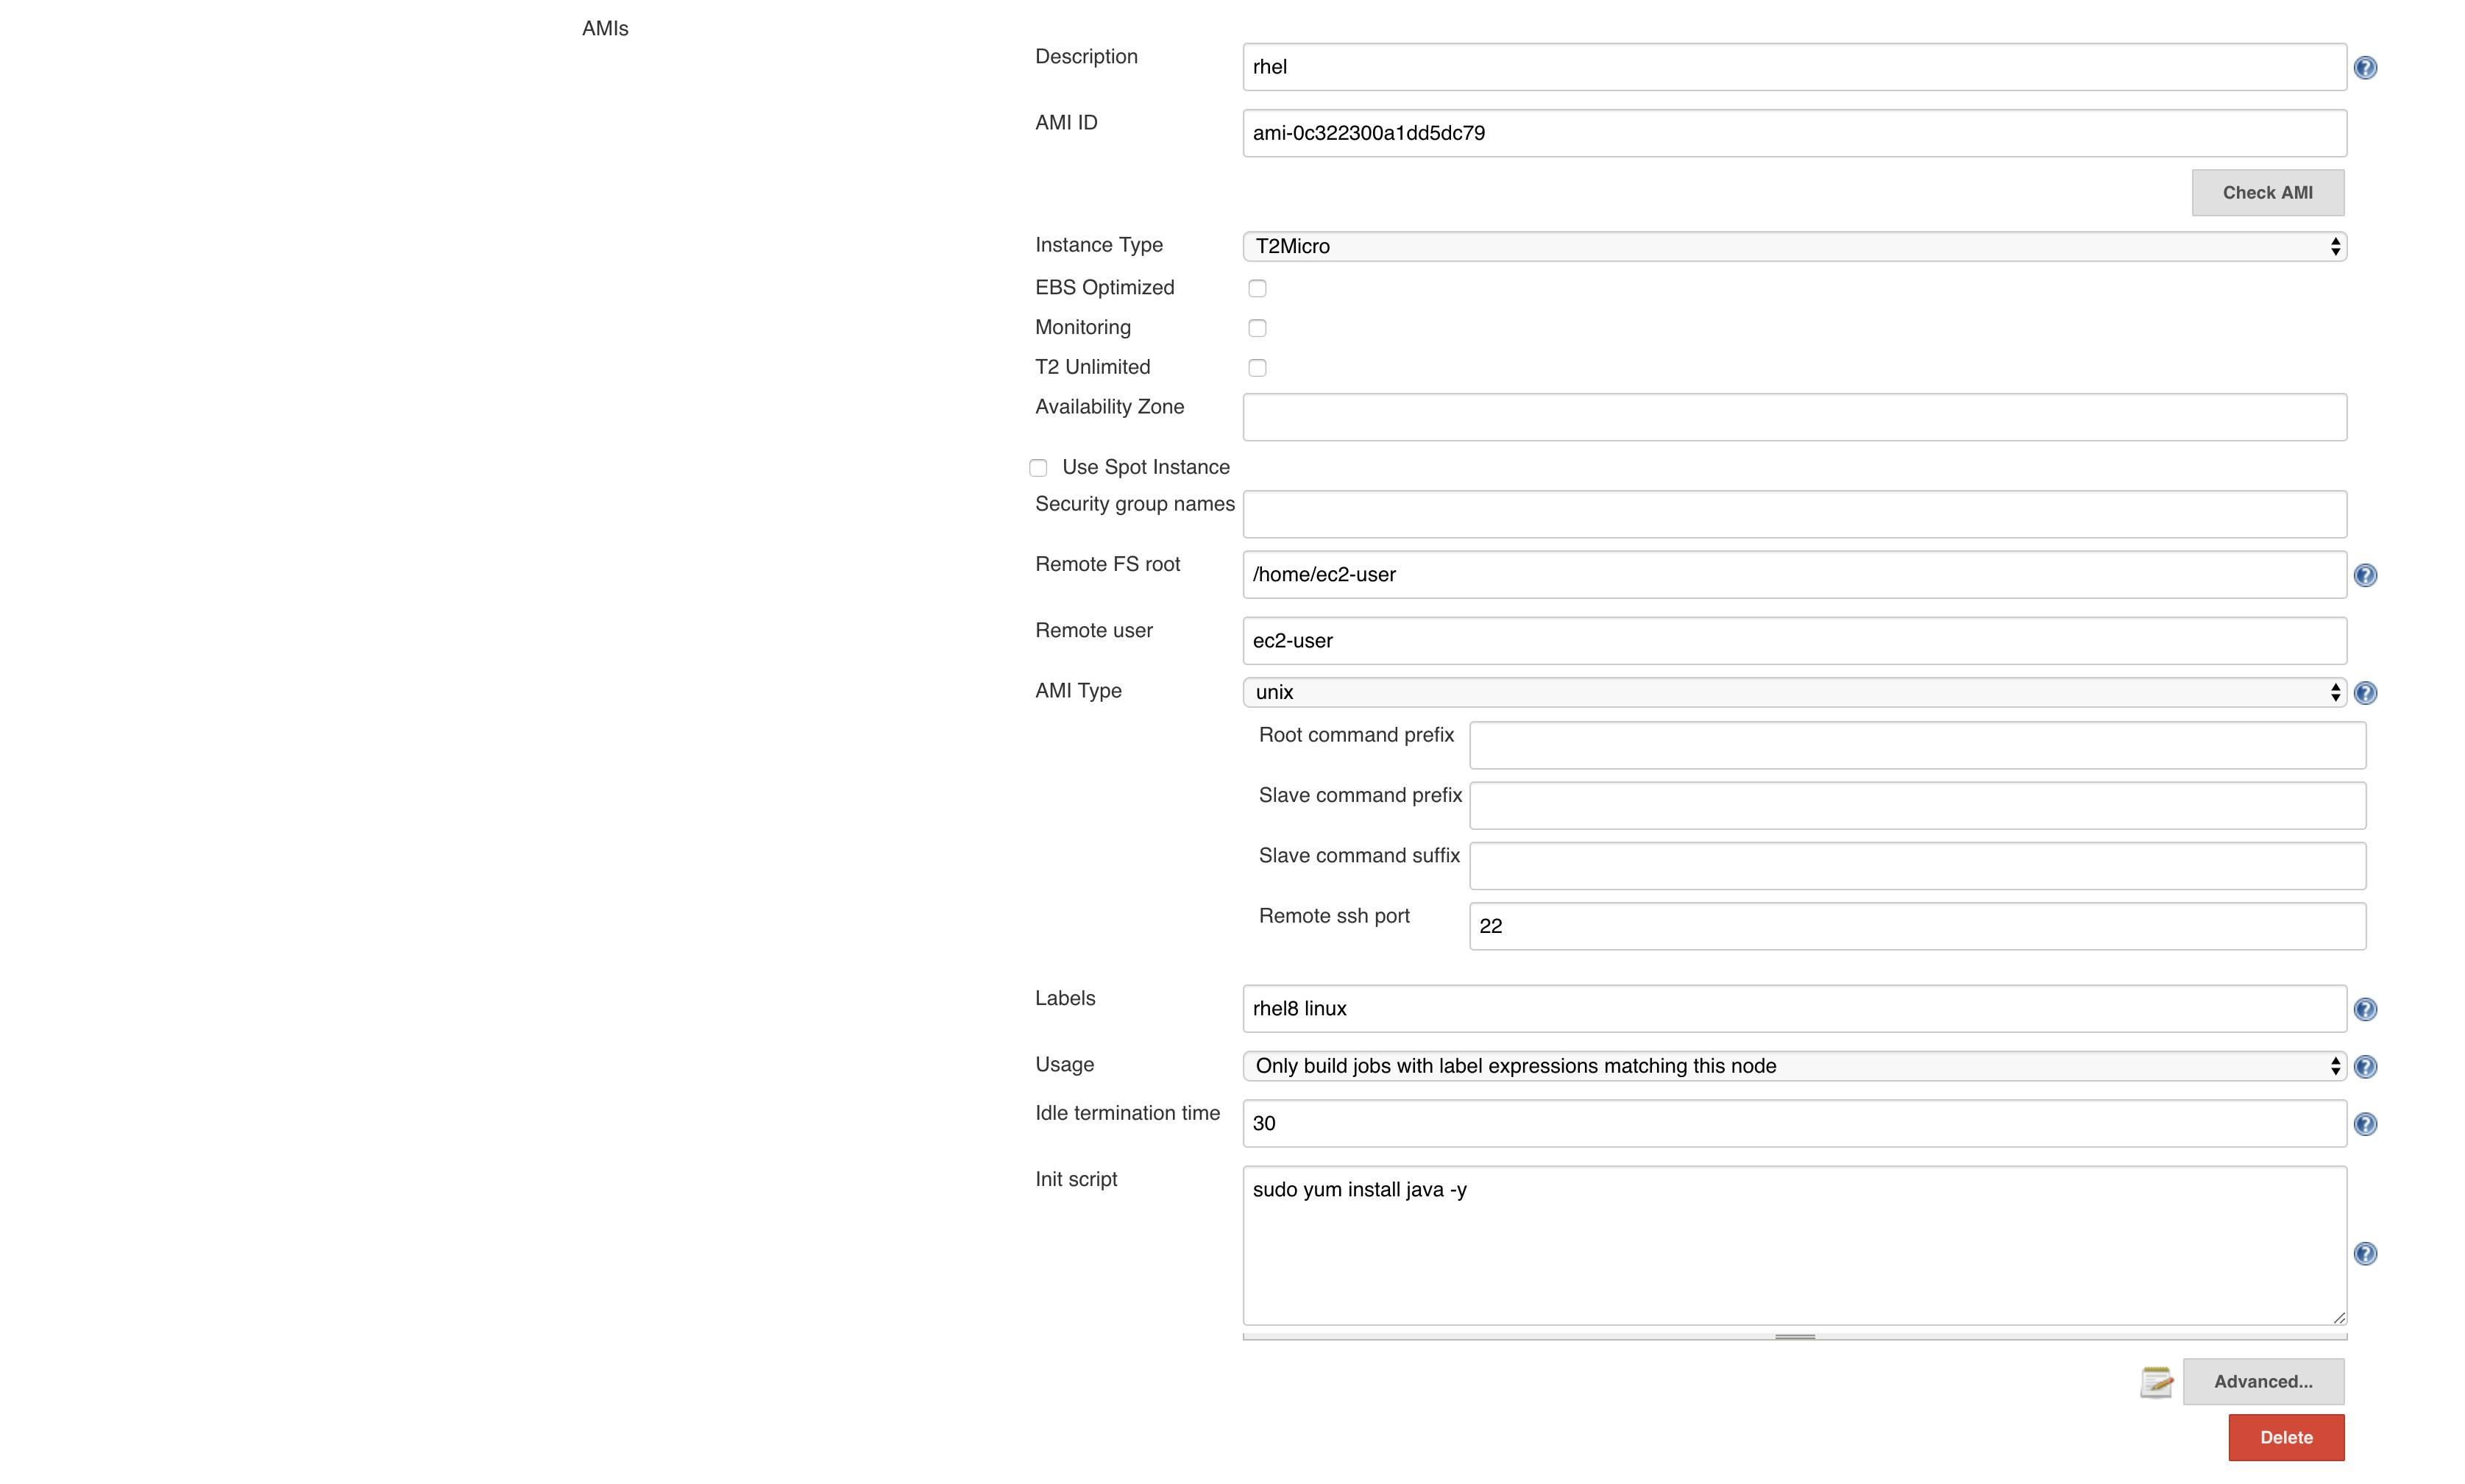
Now we need to give the AMI information which acts as the base image for spawning the slaves. To find which AMI-id to use visit the below URL:- Finding a Linux AMI Before you can launch an instance, you must select an AMI to use. As you select an AMI, consider the following…docs.aws.amazon.com
Add the description. Enter the ami-id and click on “Check AMI”. this will check if ami id provided is correct and if so it displays some details about the ami.
Select the Instance type, I have selected T2Micro since i am using free tier account. Enter the rest of the details as mentioned below.
Remote FS root : /home/ec2-user Remote user: ec2-user [changes according to type of OS] labels: rhel8 linux [this label will be mentioned in the jenkins job] Idle termination time : 30 [change accordingly]
Idle termination time tells us how many minutes slave can be idle before terminating it. Init script : We can let jenkins install any required softwares/tools in the slave machine once it is spawned.
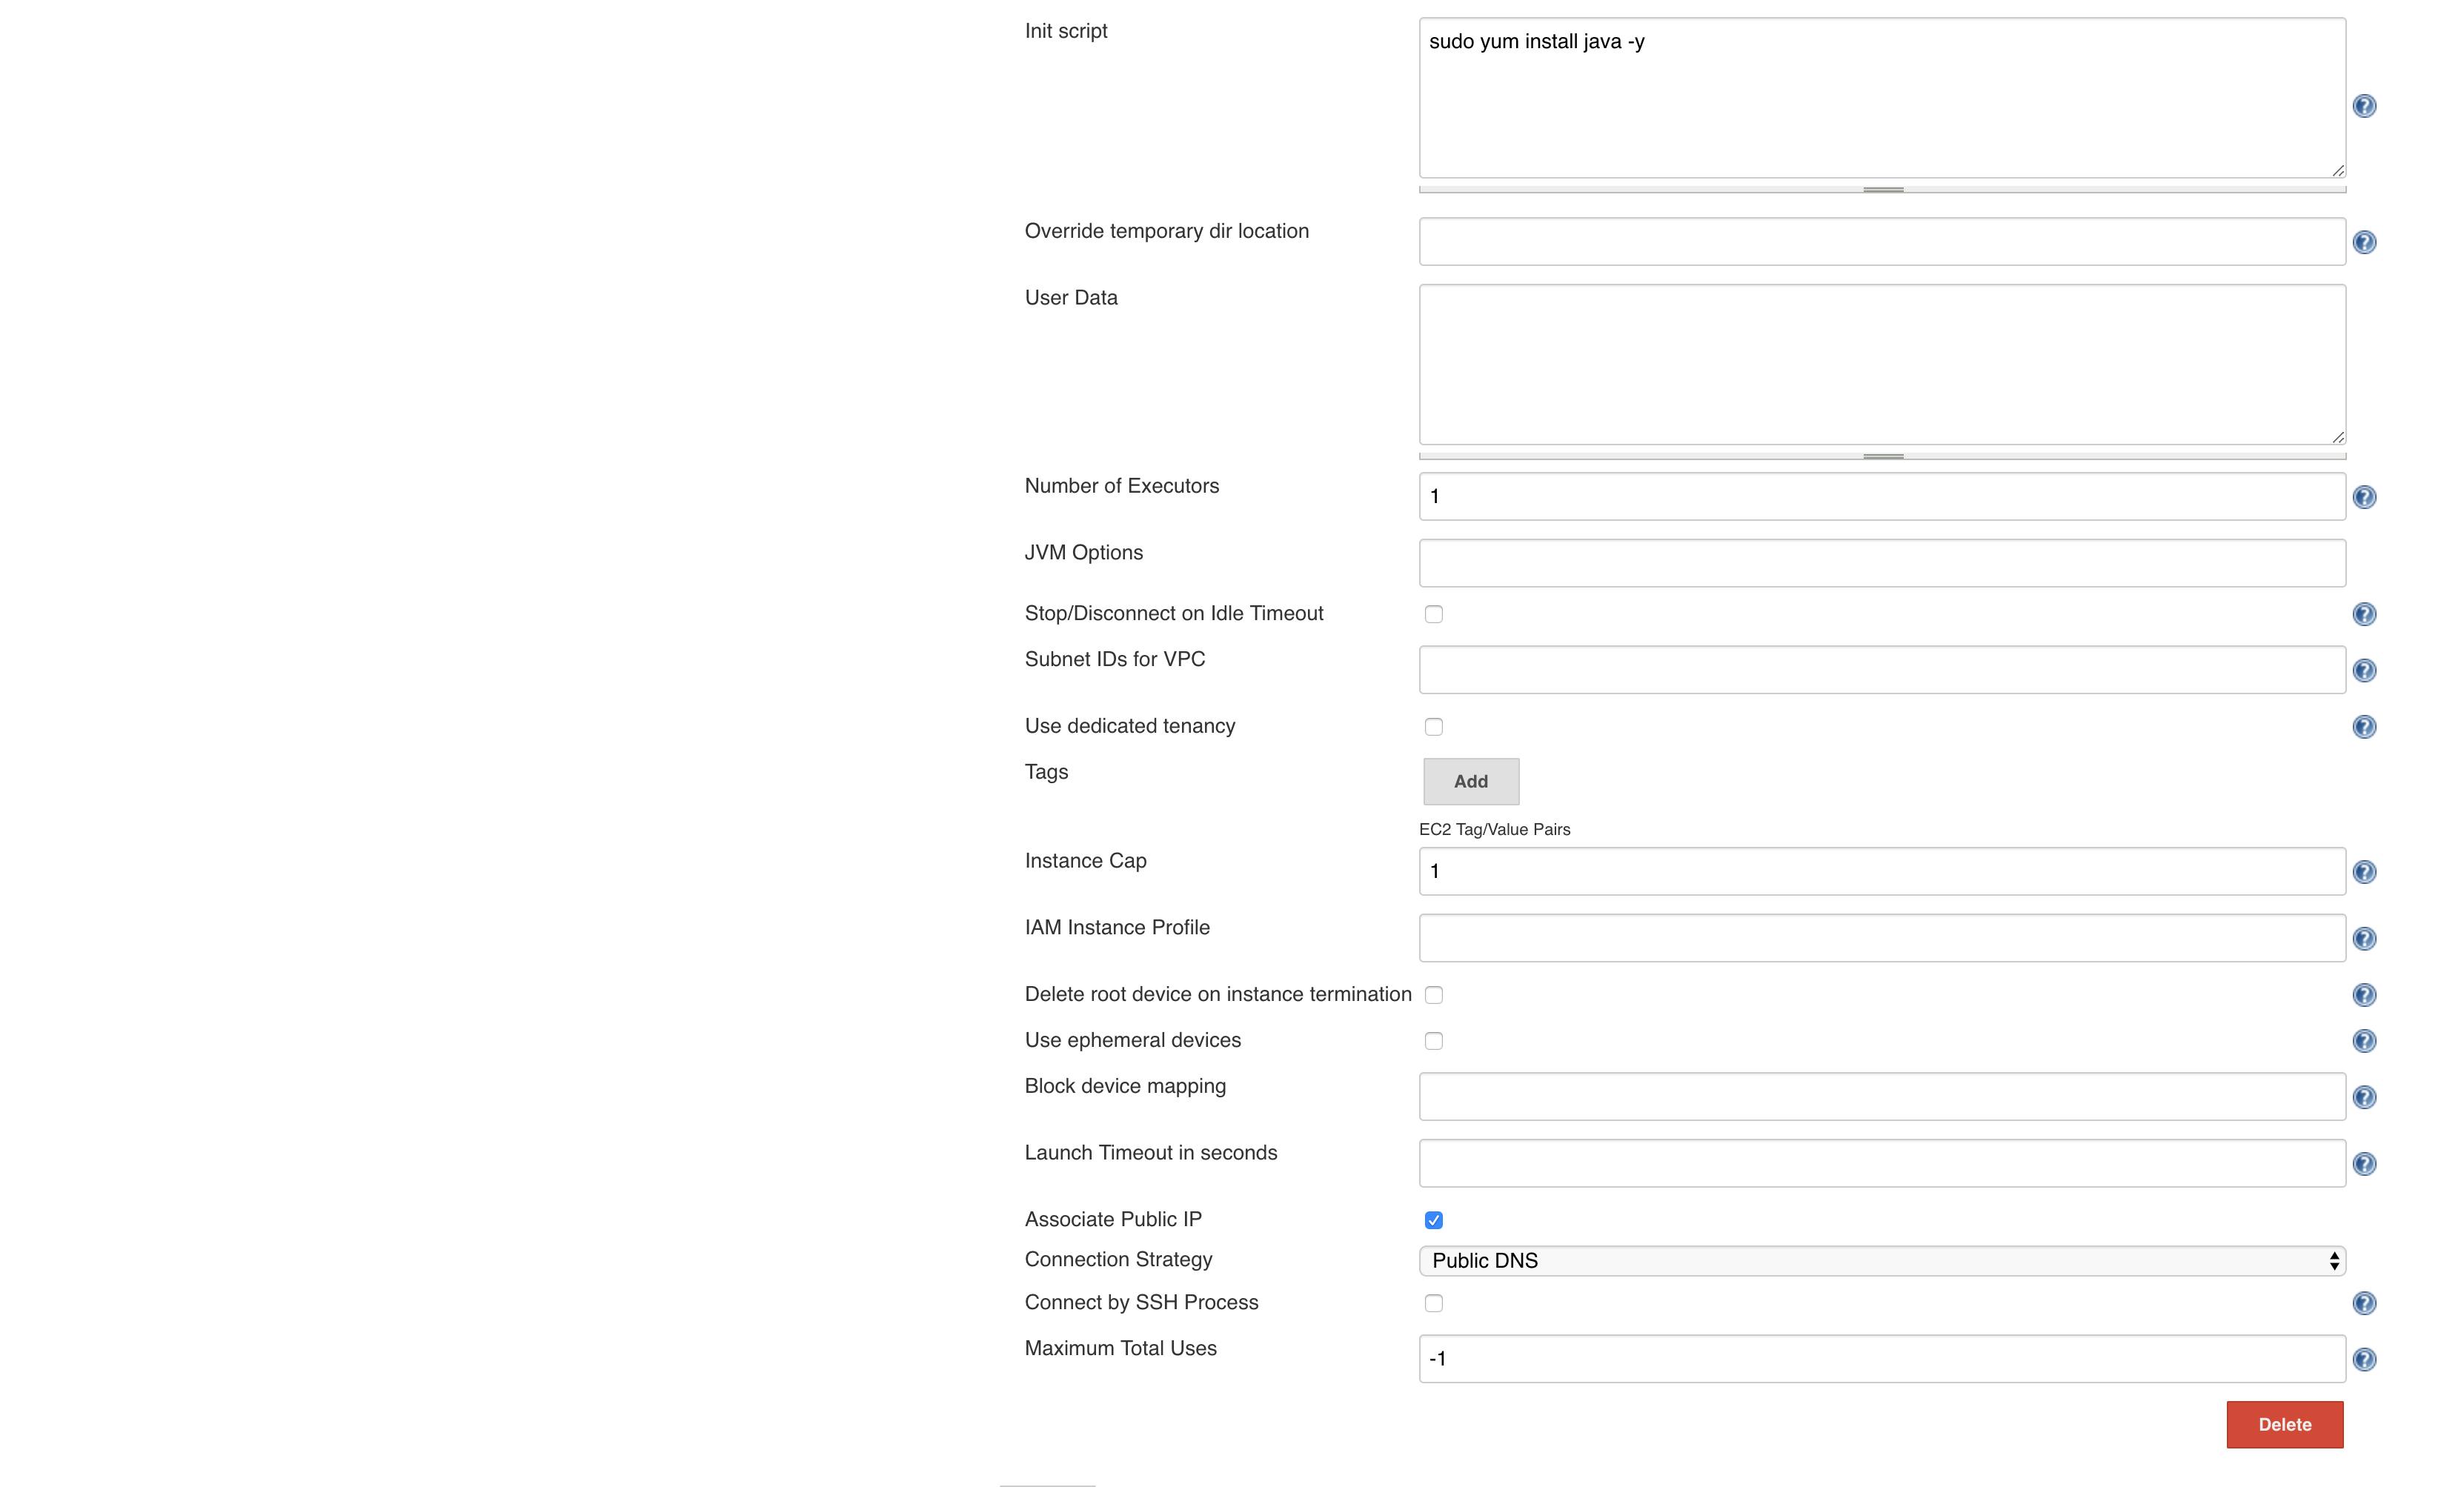
Click on the Advanced button which is right after the Init Script. Now give the details as below for some important attributes.
Number of Executers : 1 [Maximum number of concurrent builds on this slave] Instance Cap: 1 [max number of instance that can be spawned for this AMI-id]
select “Associate public IP” Connection strategy: Public DNS
I have selected Public DNS because, my jenkins master is running locally on my desktop and private IP doesn’t work.
Save the configuration.
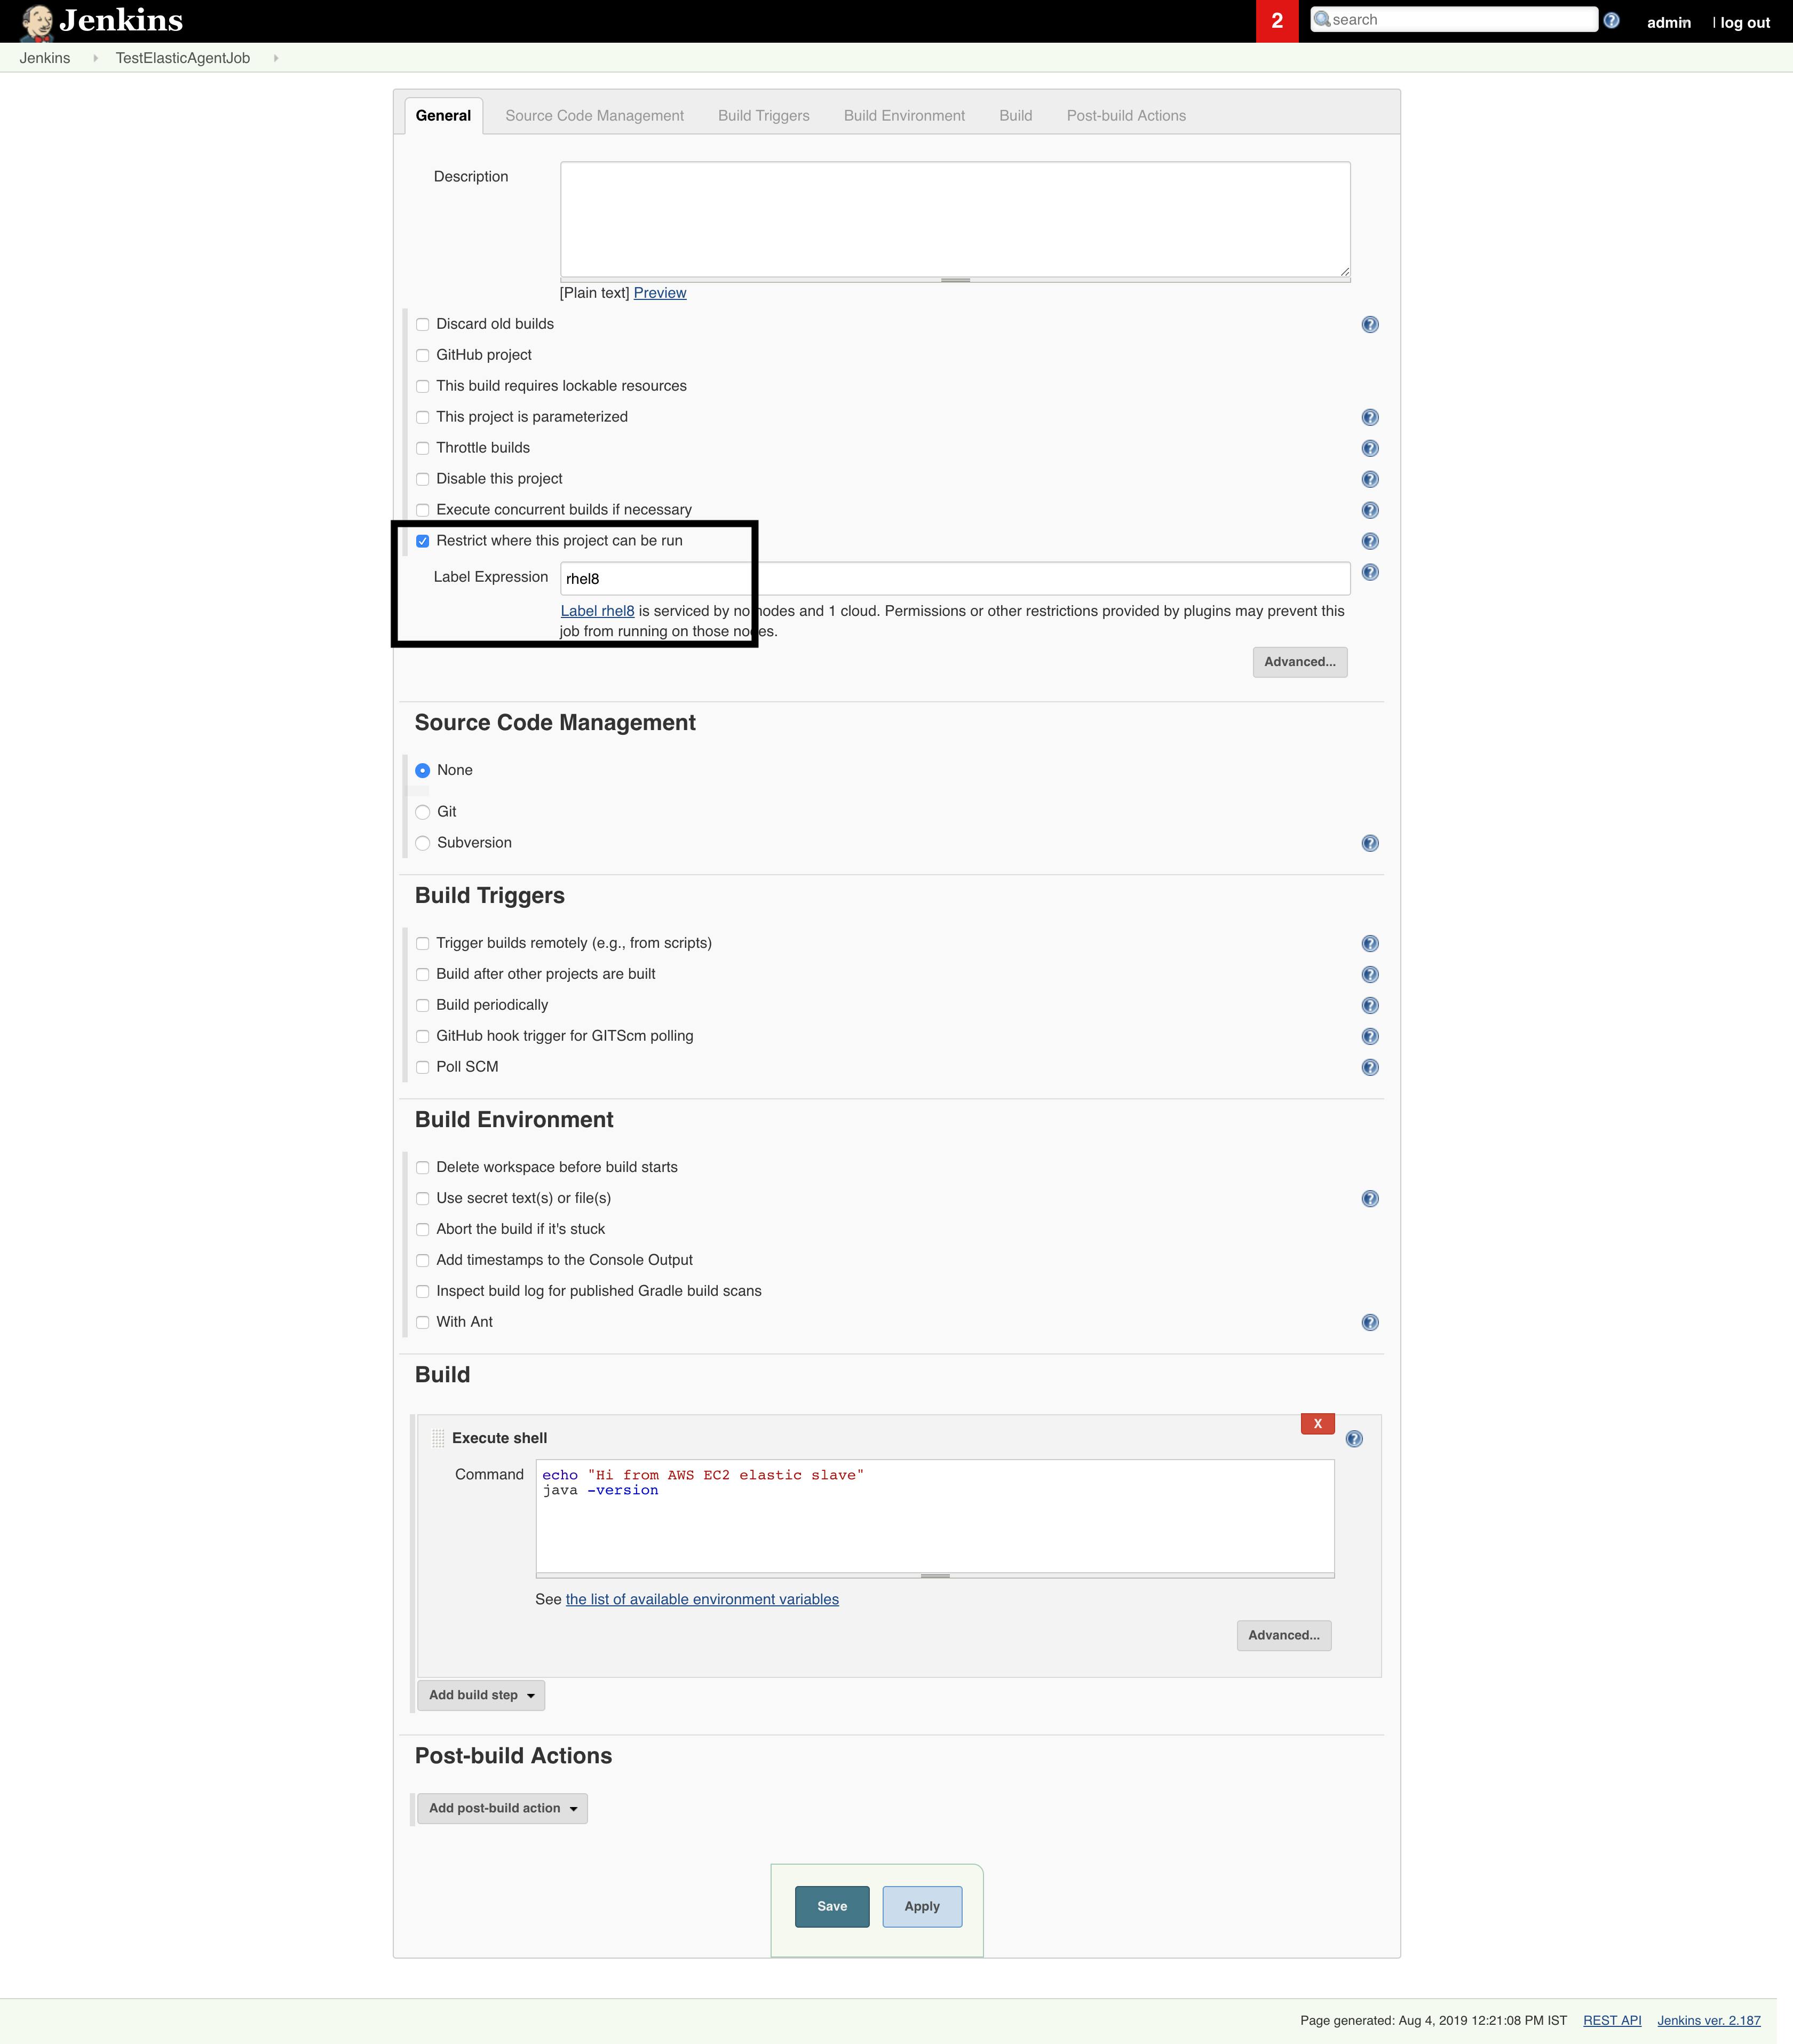
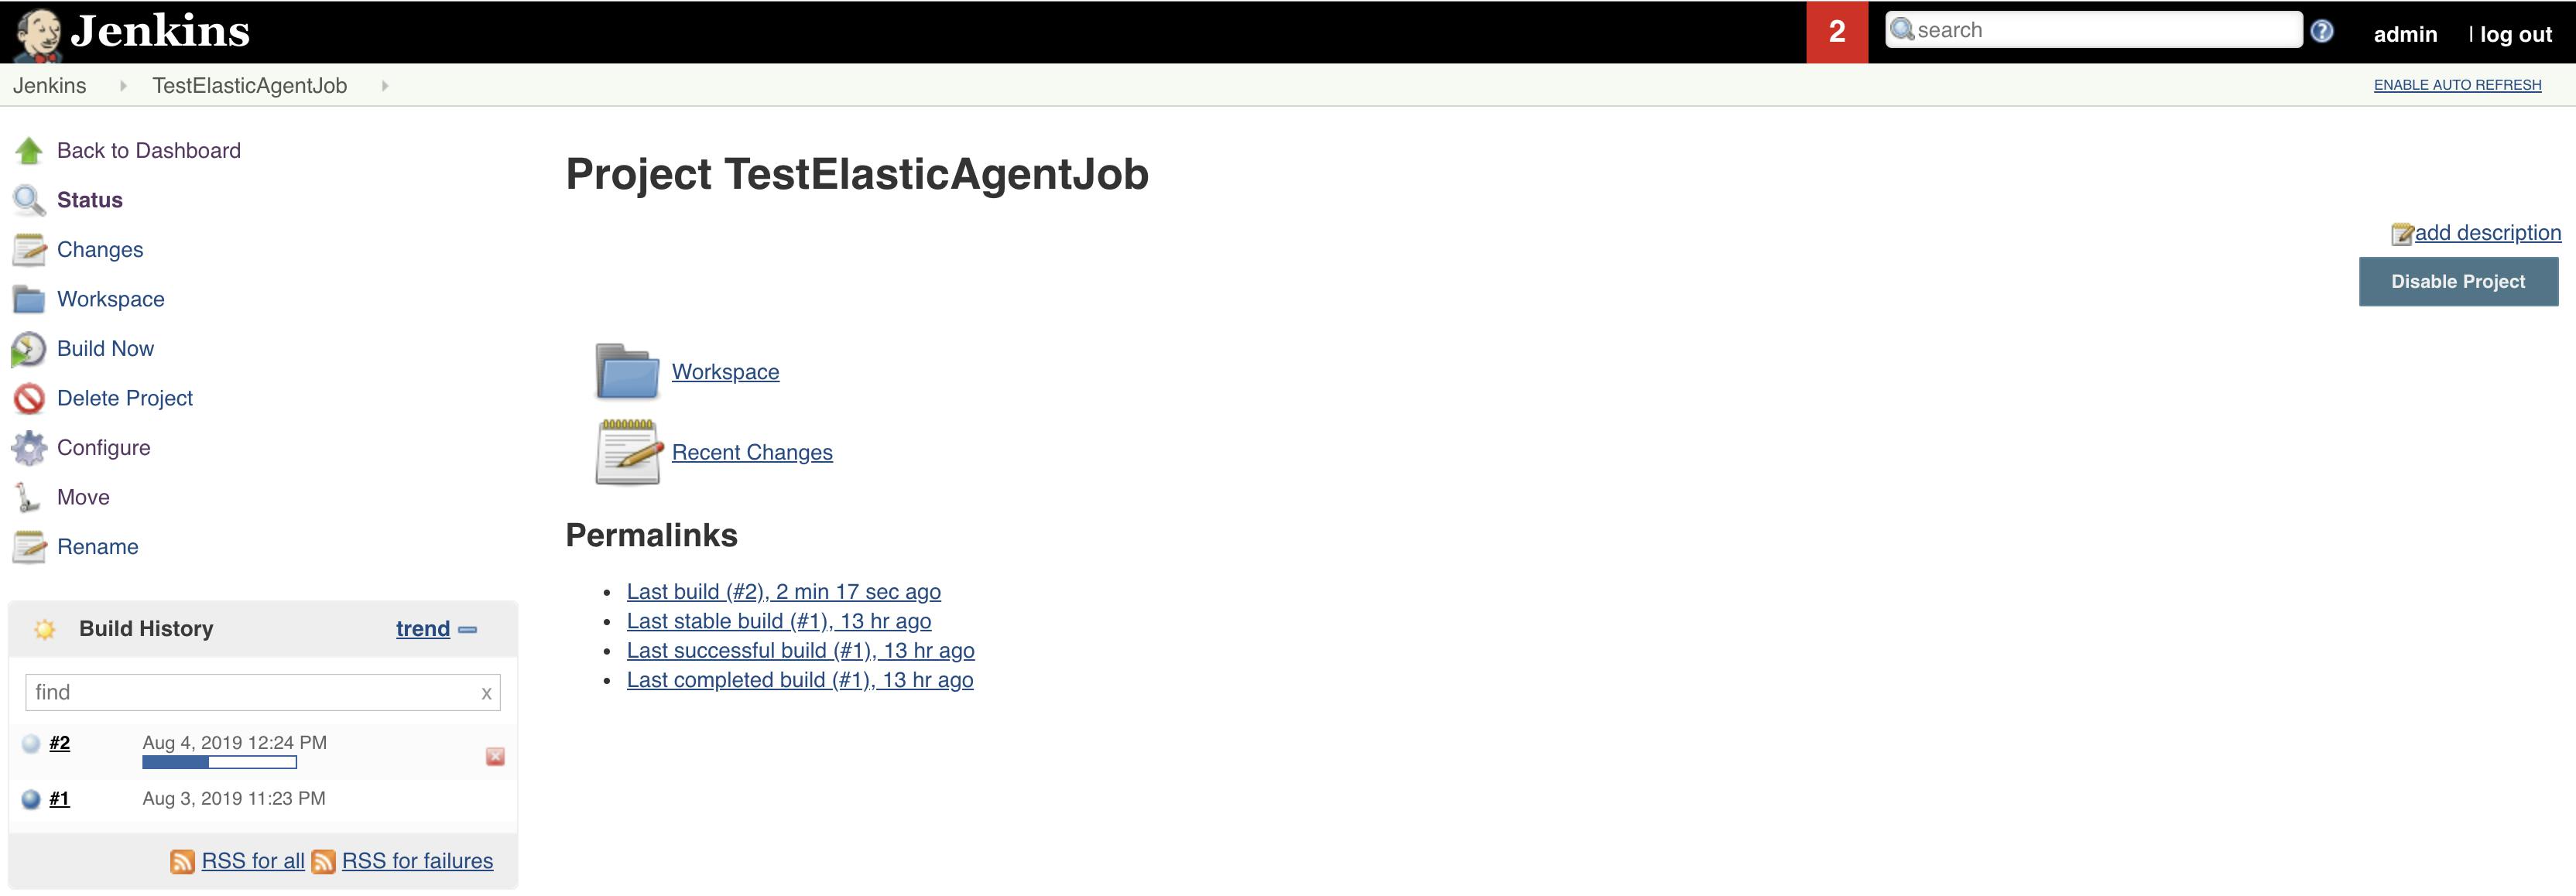
Create a test job and restrict the project to run in the elastic slave by adding the label same as we assigned to slave configuration above.
Now build the project.
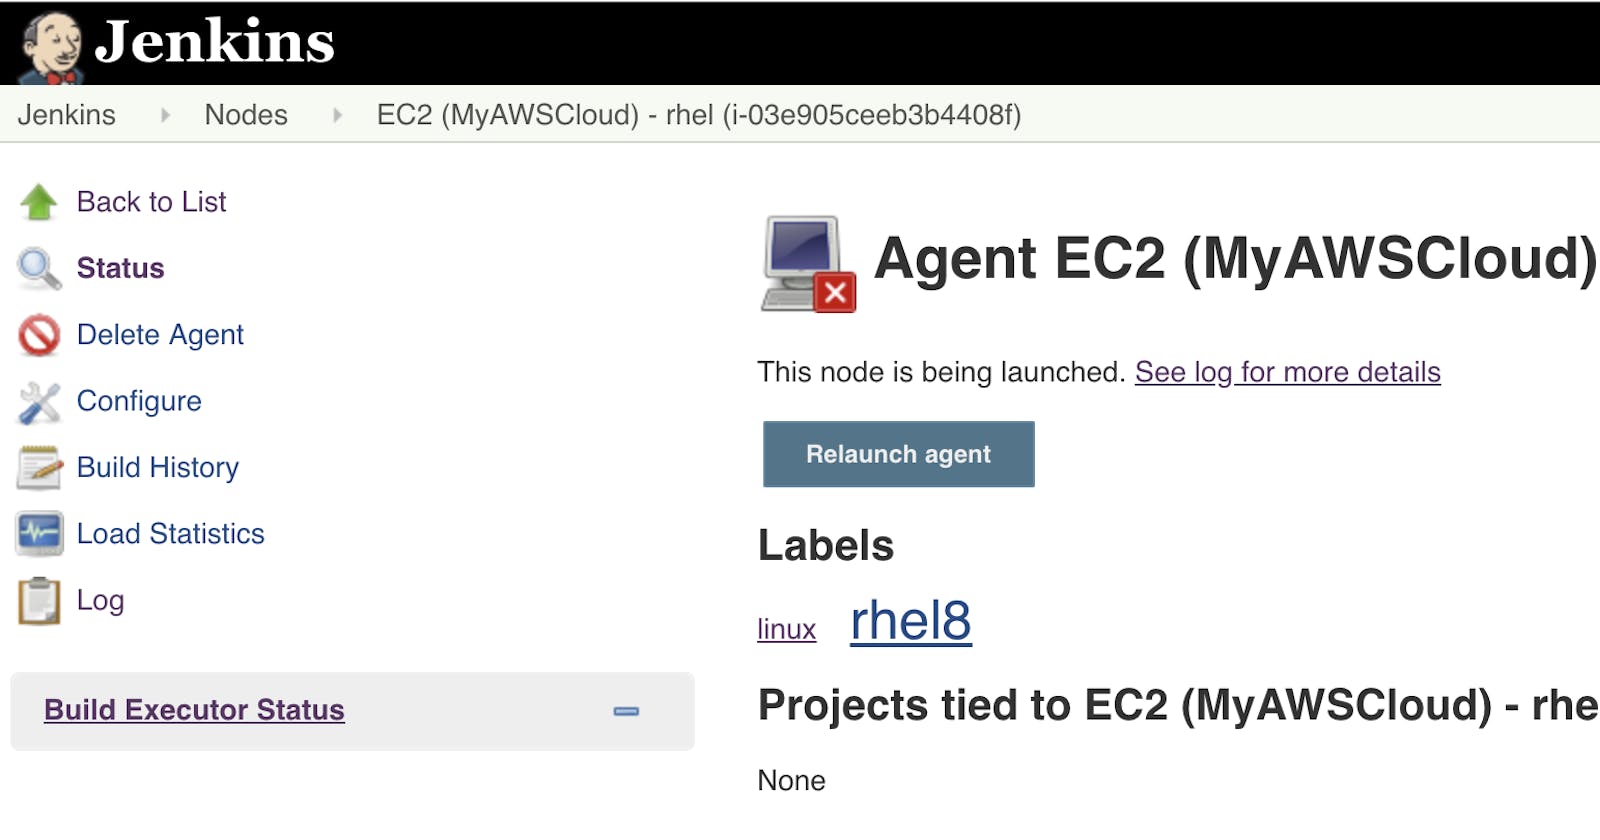
Build gets scheduled and we can see jenkins will try to bring up the slave.
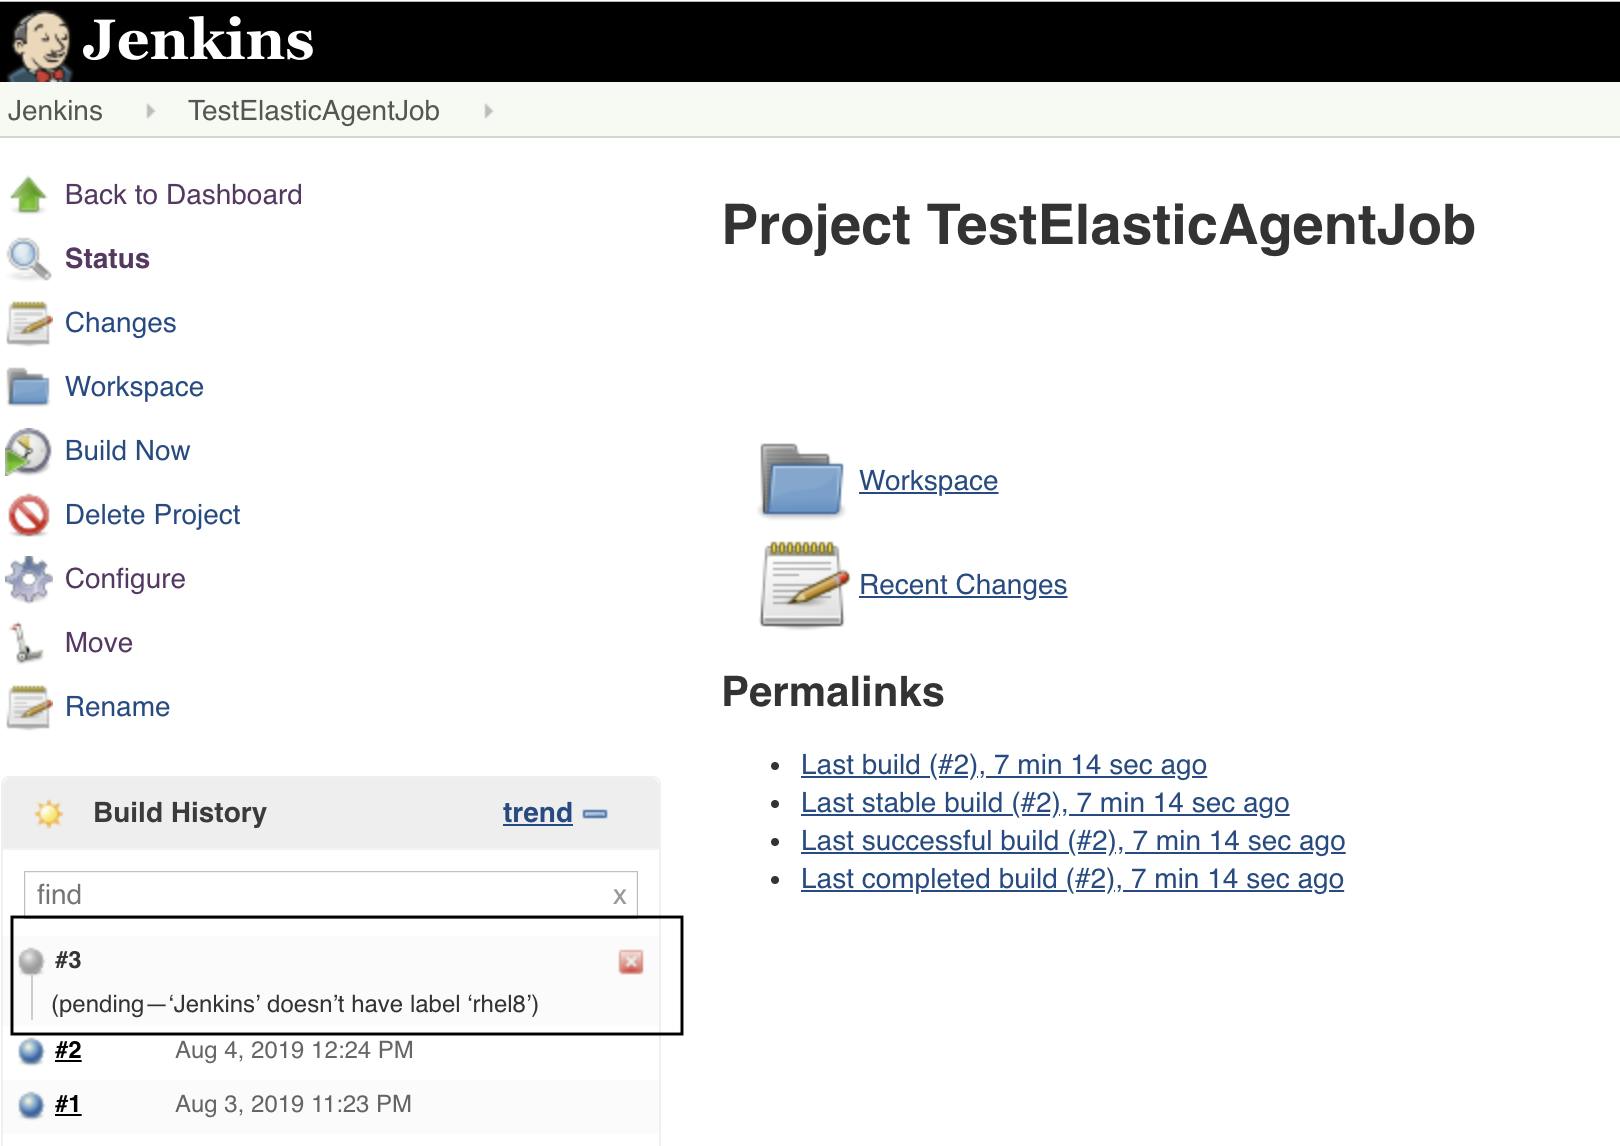
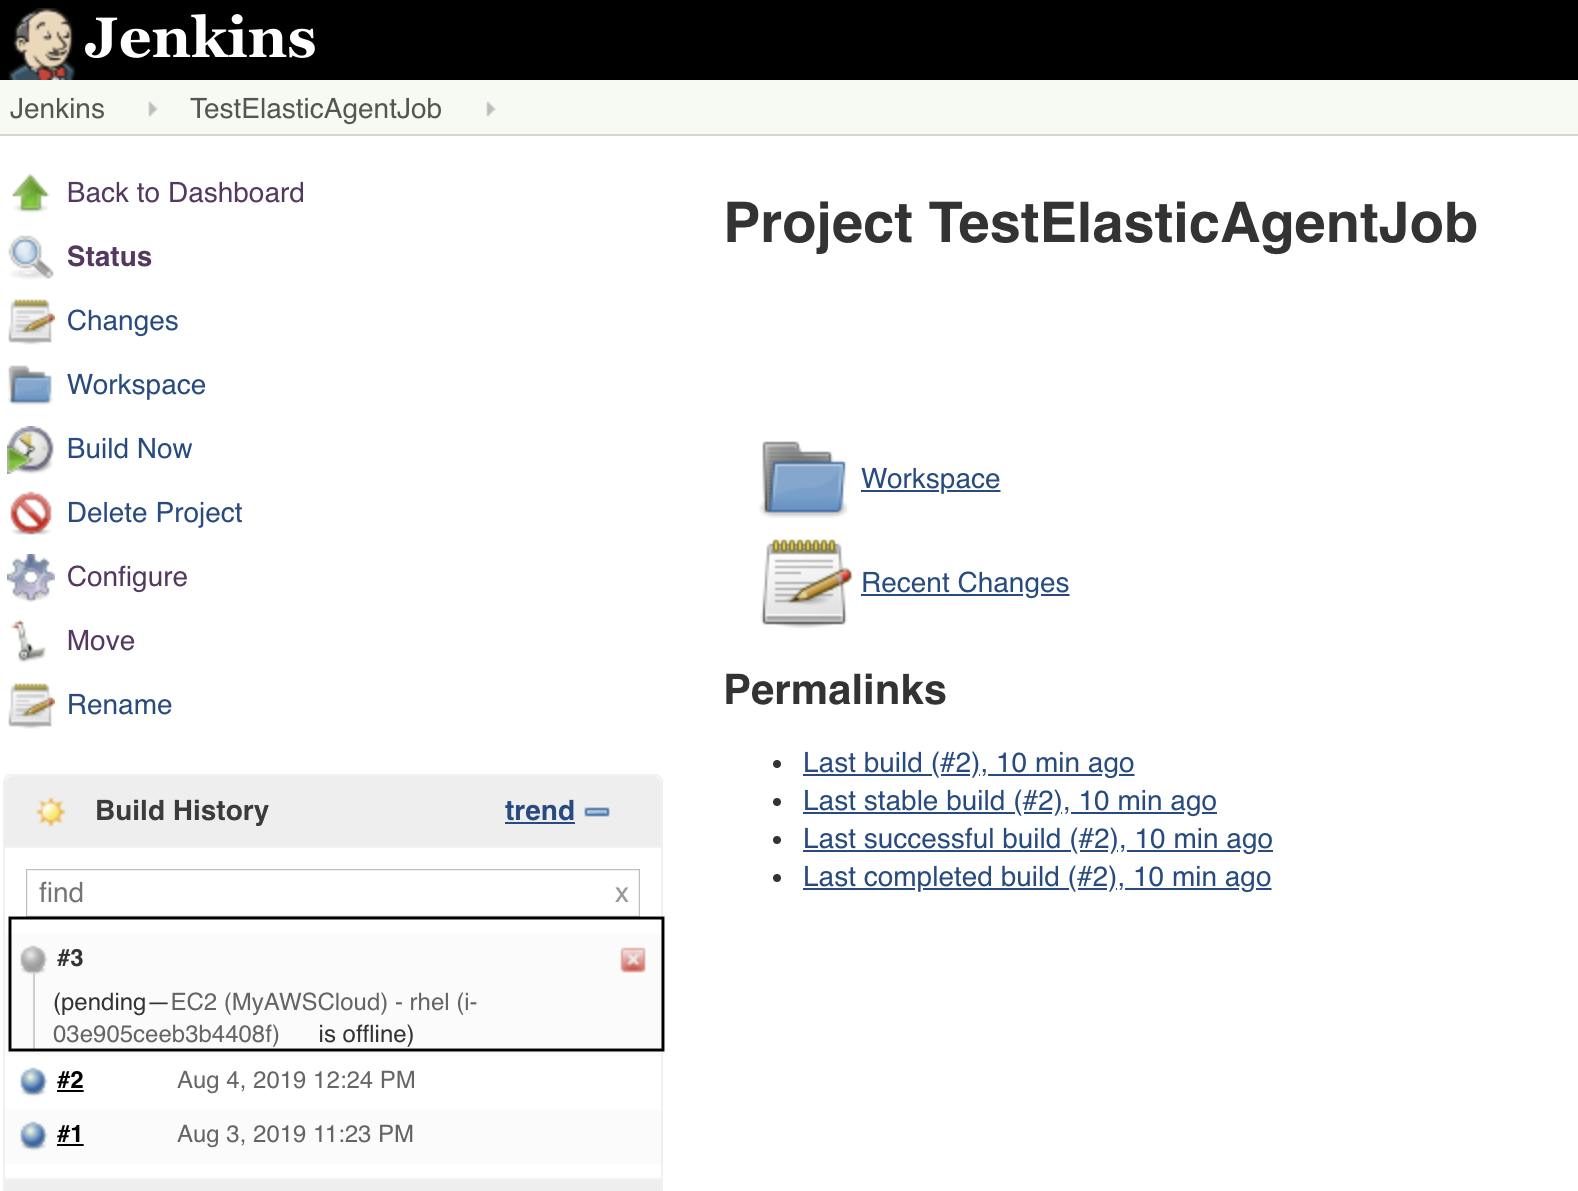
Goto Manage Jenkins → Manage Nodes and observe that node is getting launched.
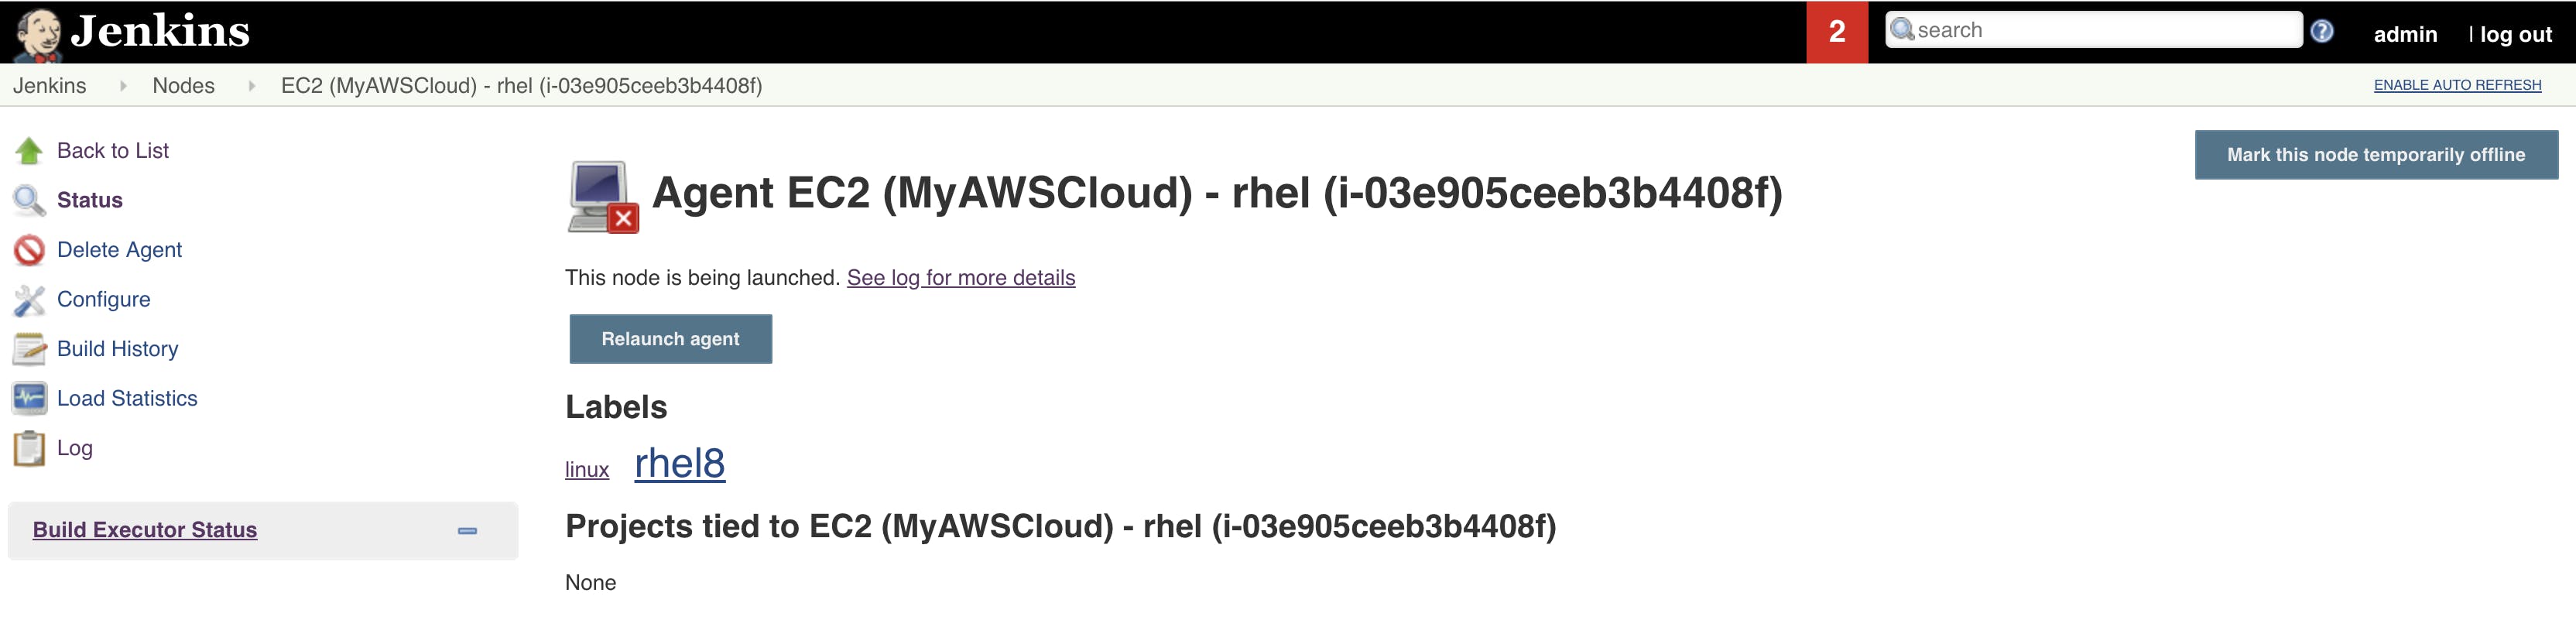
Also check the launch logs to see what is happening. Goto EC2 console and see the instance is being launched..

After executing the init scripts successfully, the slave will come online and build starts running on this slave.
Once the job is completed we can check the console output,
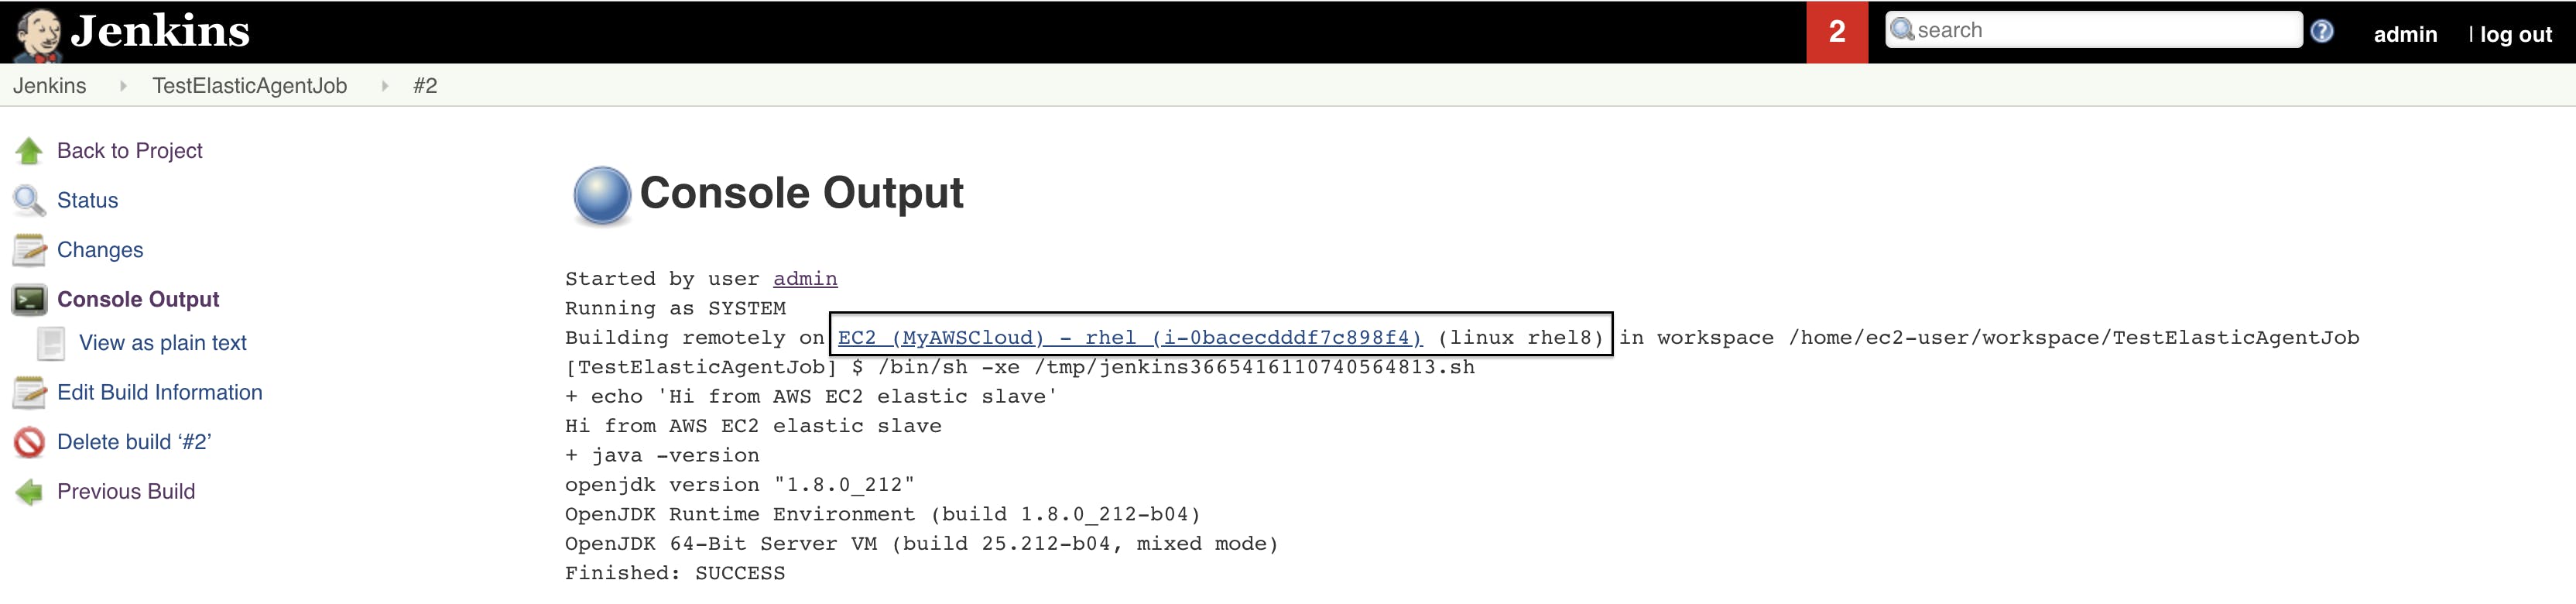
This way we can use AWS EC2 instance as dynamic slaves that will take the workload in the Jenkins.
Hope you learnt something!
Follow me on twitter for interesting articles..
Thanks,